Paving Workflows
Tired of drafting complex paving patterns by hand? Paving hatches never exactly what you need? Worry no more! Paving Workflows are here to make your life easier. Quickly define complex paving patterns with a couple clicks. All you need to do is draw a boundary!
Starting is Easy
Just open Rhino and drag in the workflow, no Grasshopper knowledge required!
Once you have your Rhino file open, simply drag and drop the associated “.gh” workflow script from the folder into your Rhino window. You may be asked to install Land Kit or a few other plugins, follow the instructions for this in the README.txt.

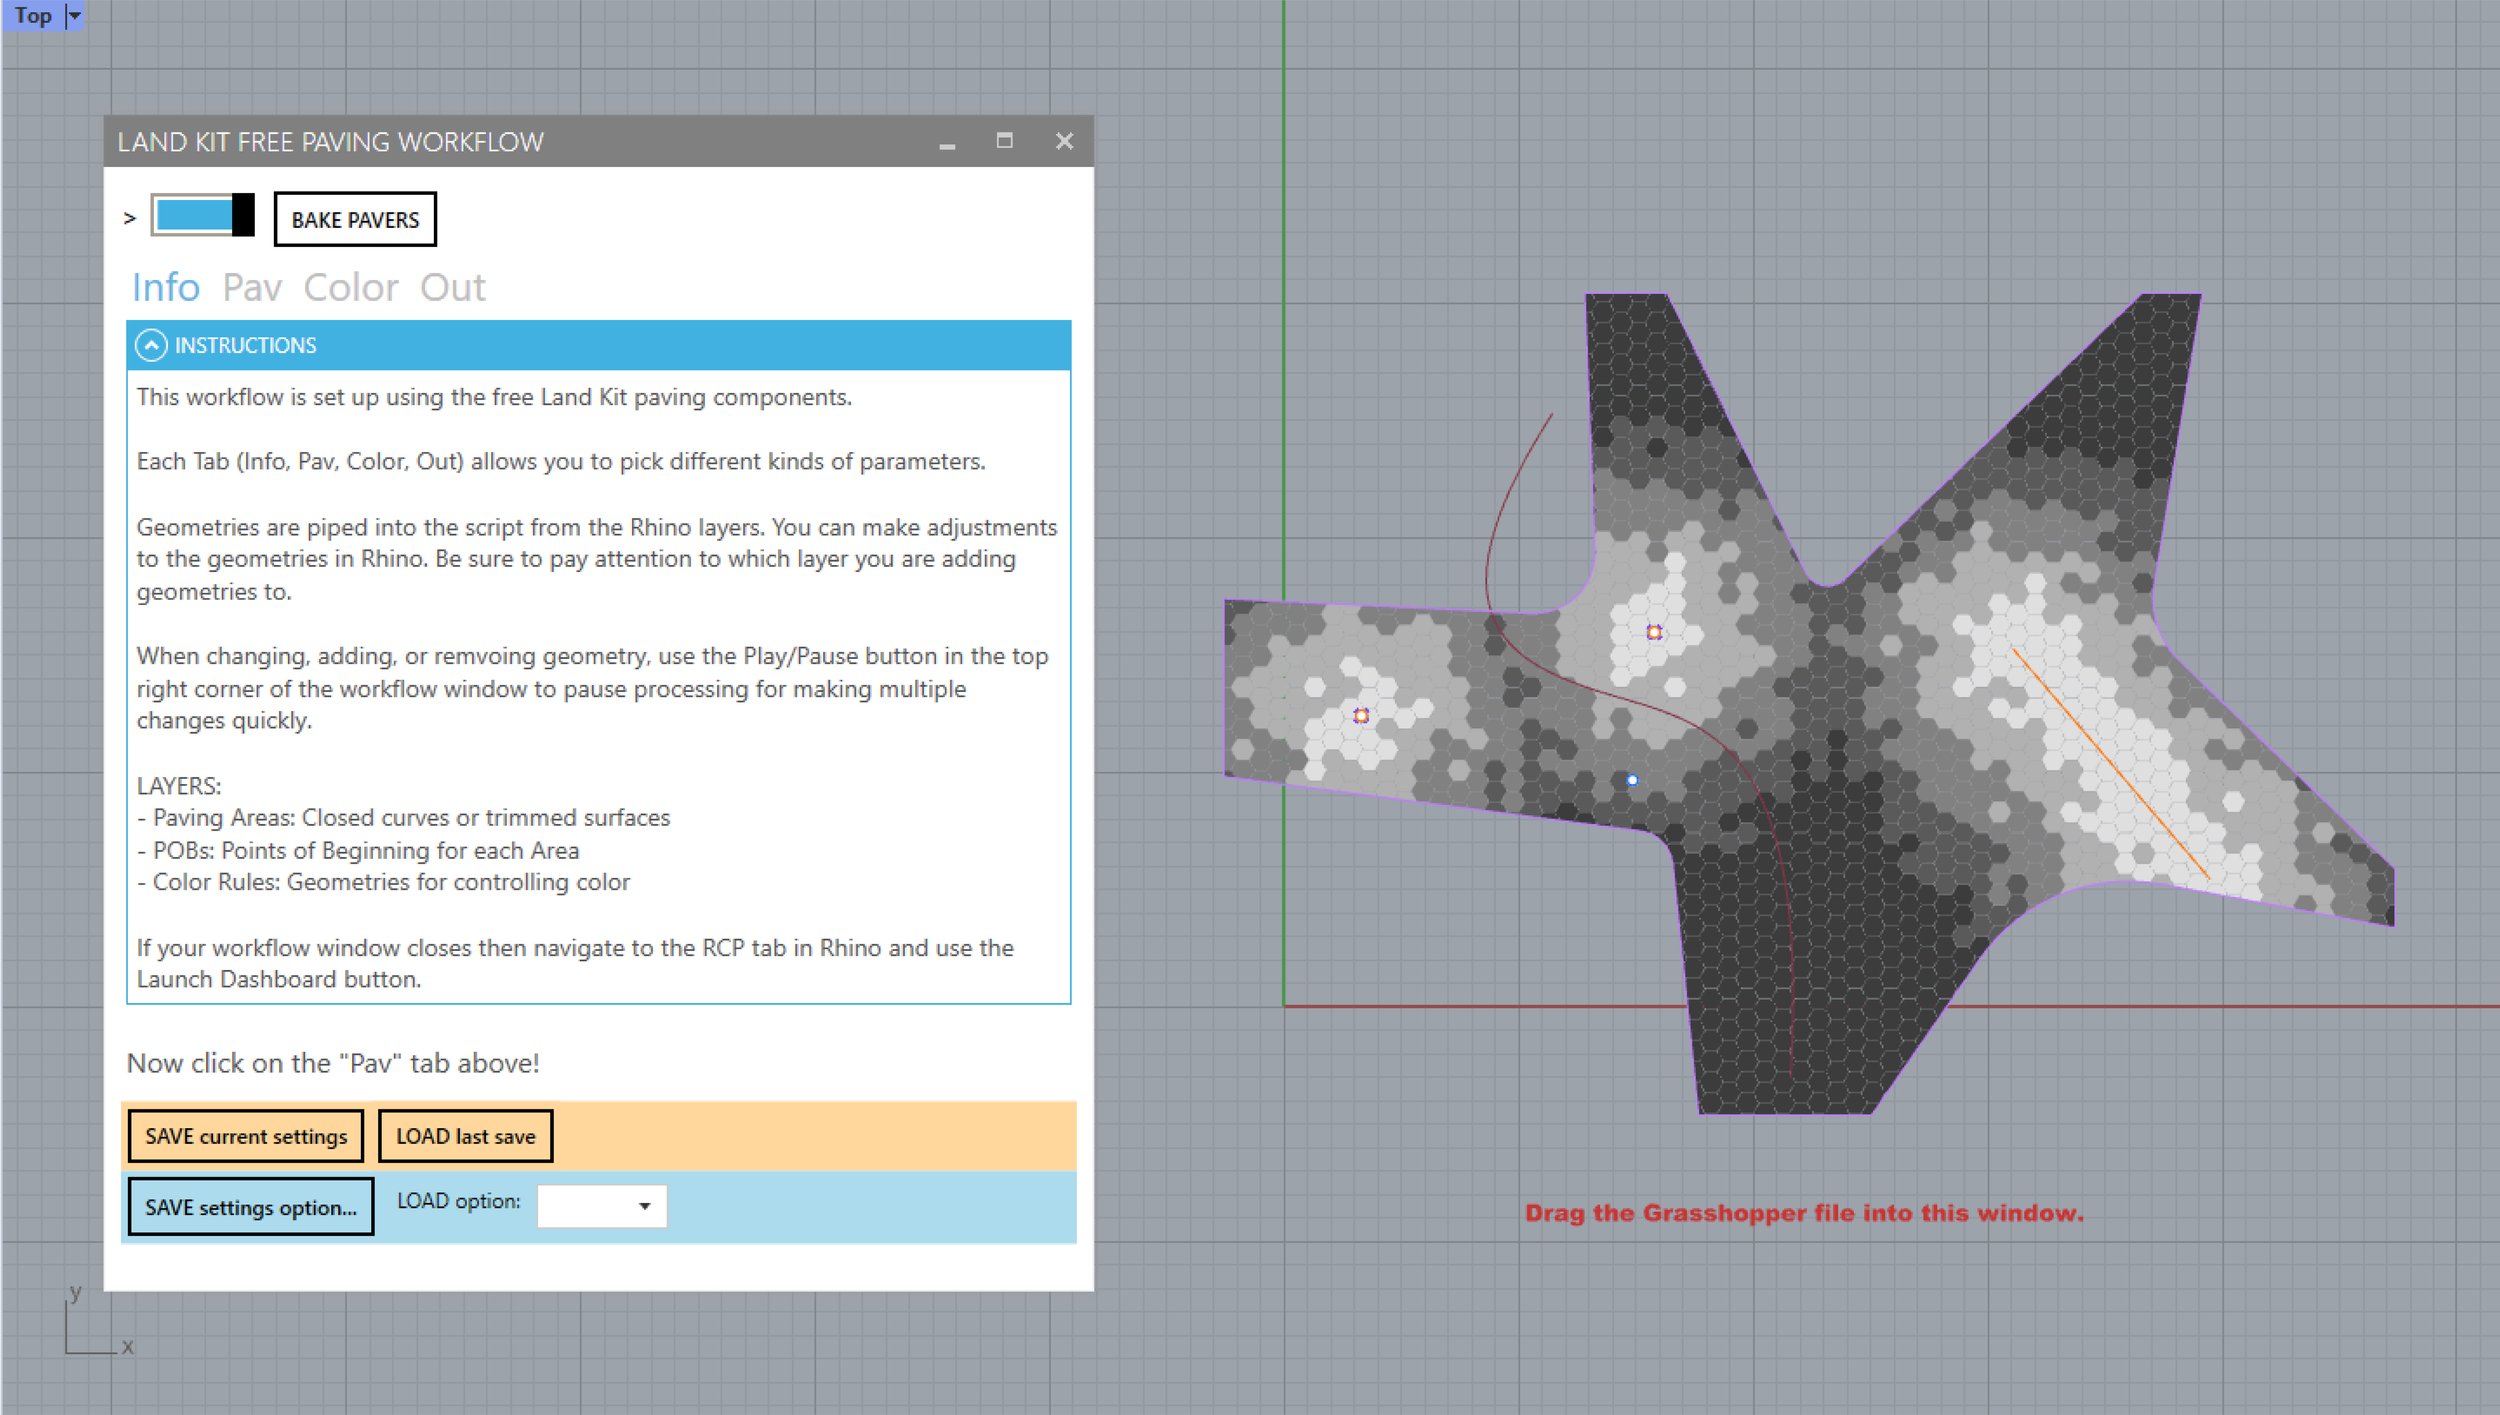
A panel will open such as the one below. Read through the information in the Info tab, as it will direct you to what layers to use and how. Then, draw a curve on the Paving Areas layer and you’re on your way!
Paving with the click of a button
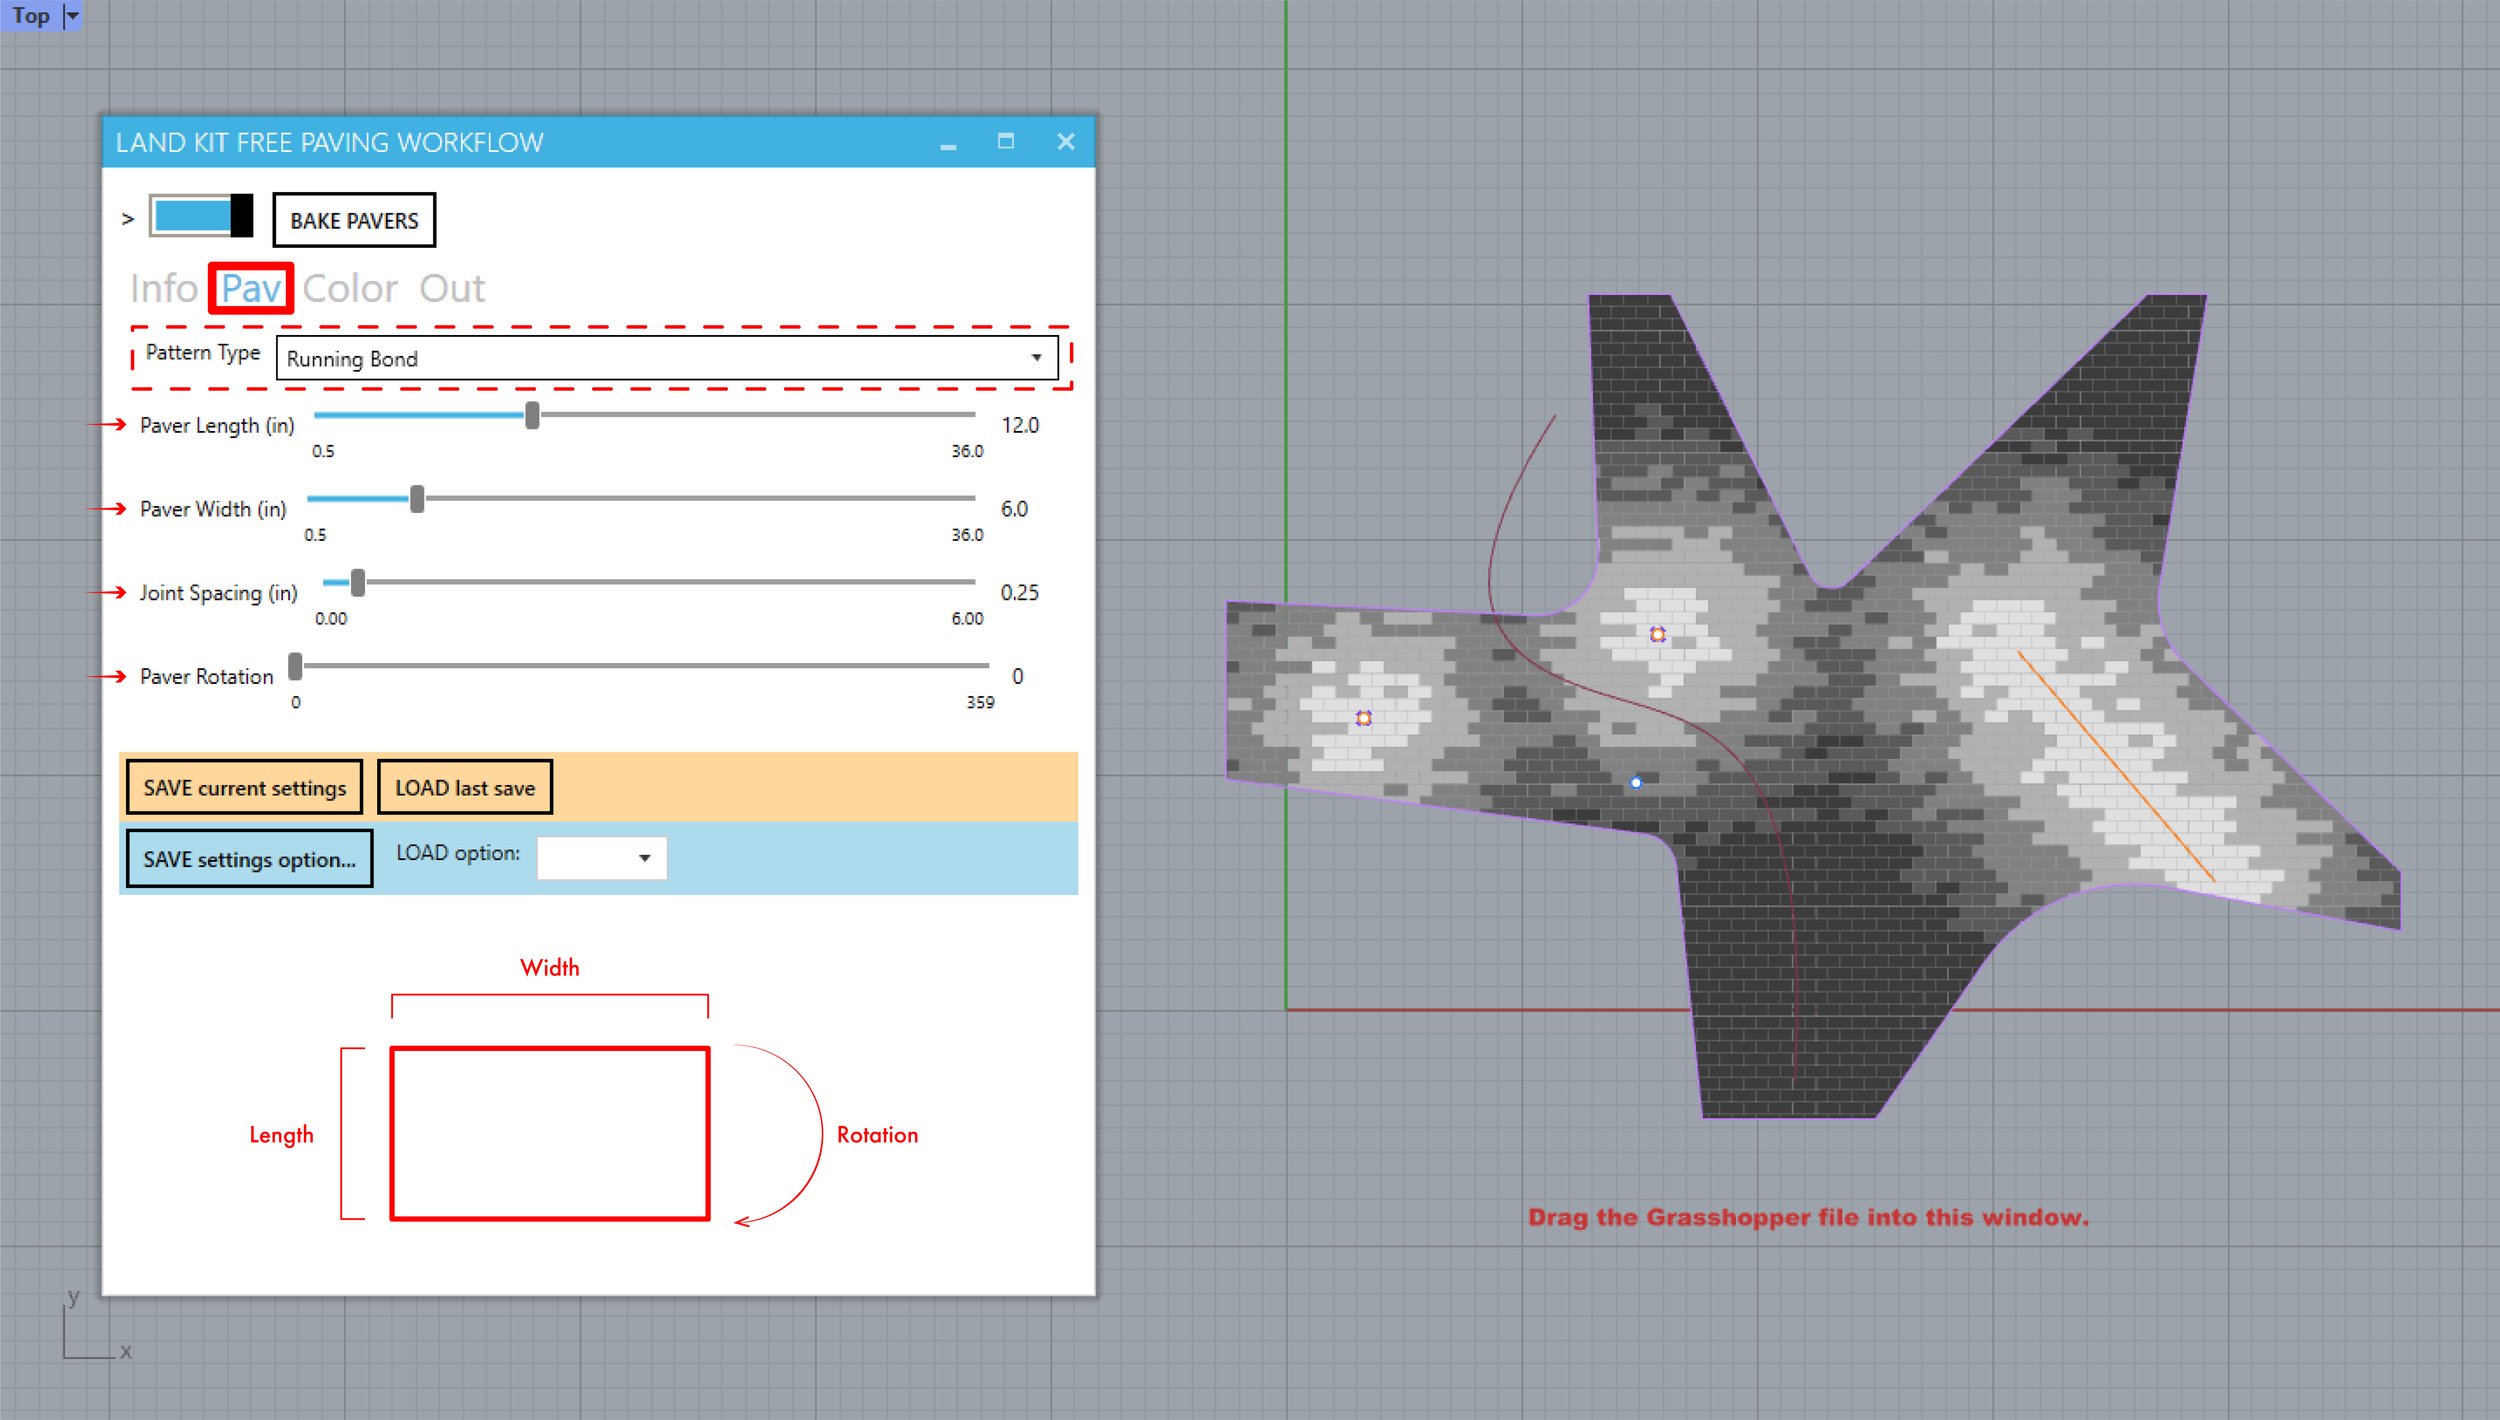
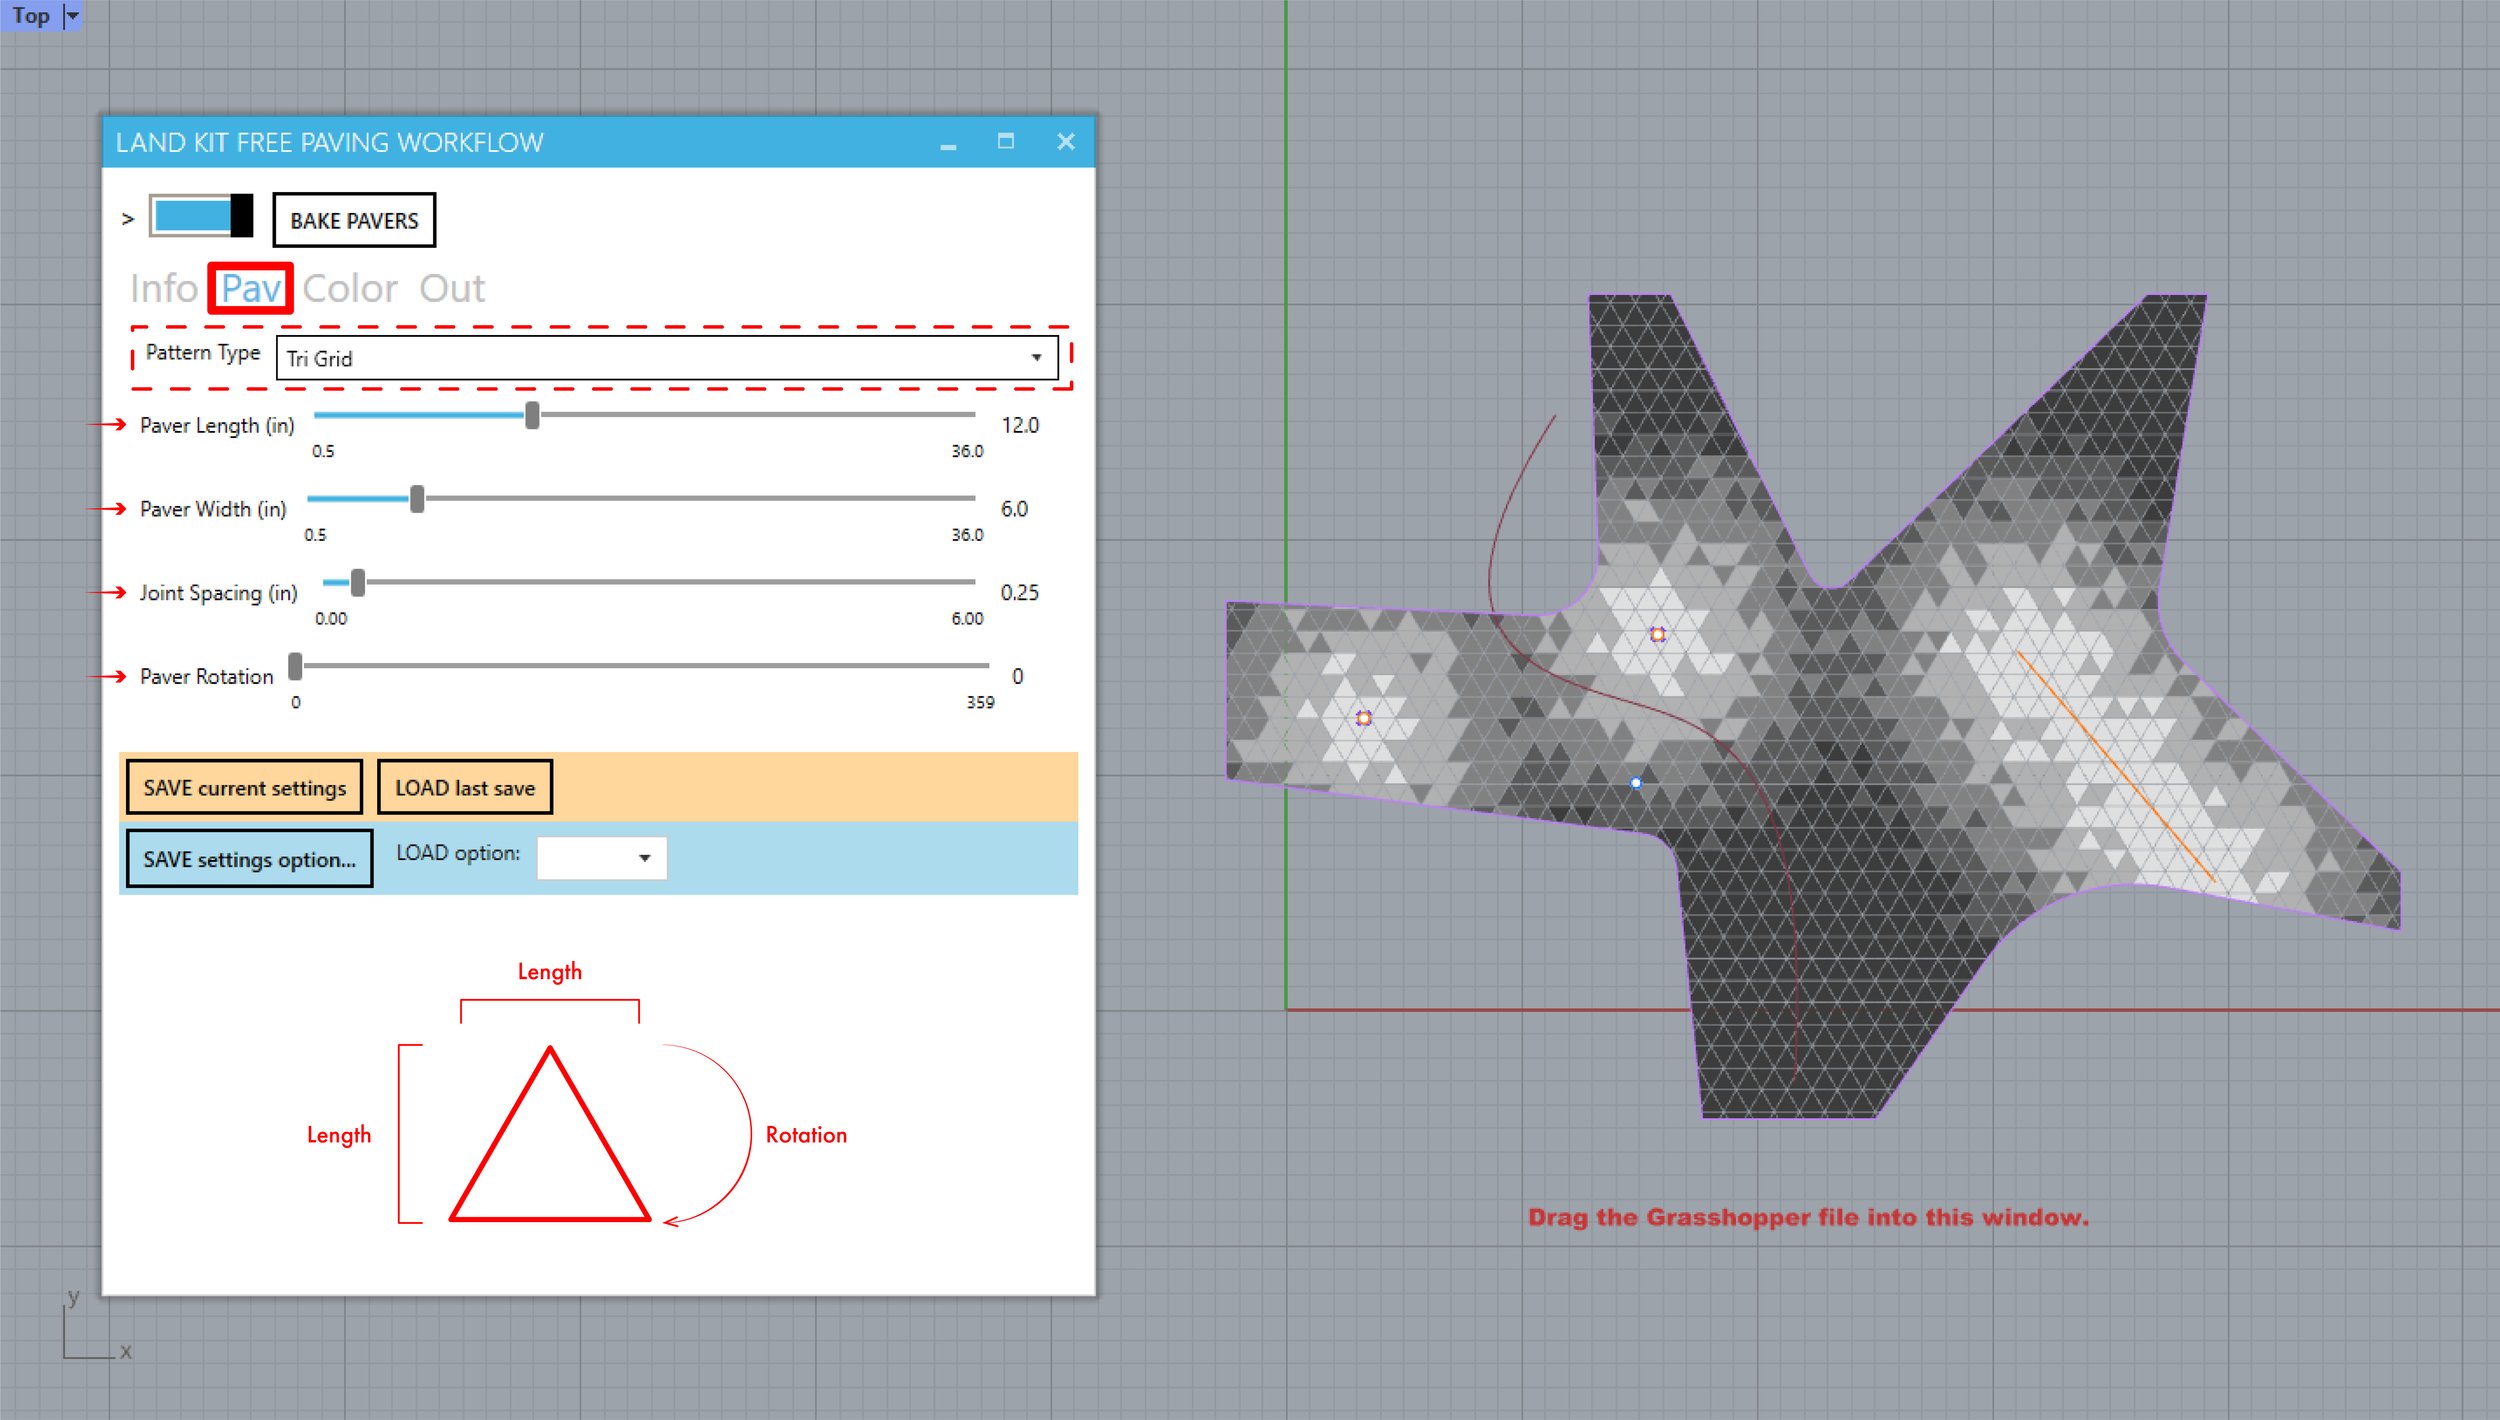
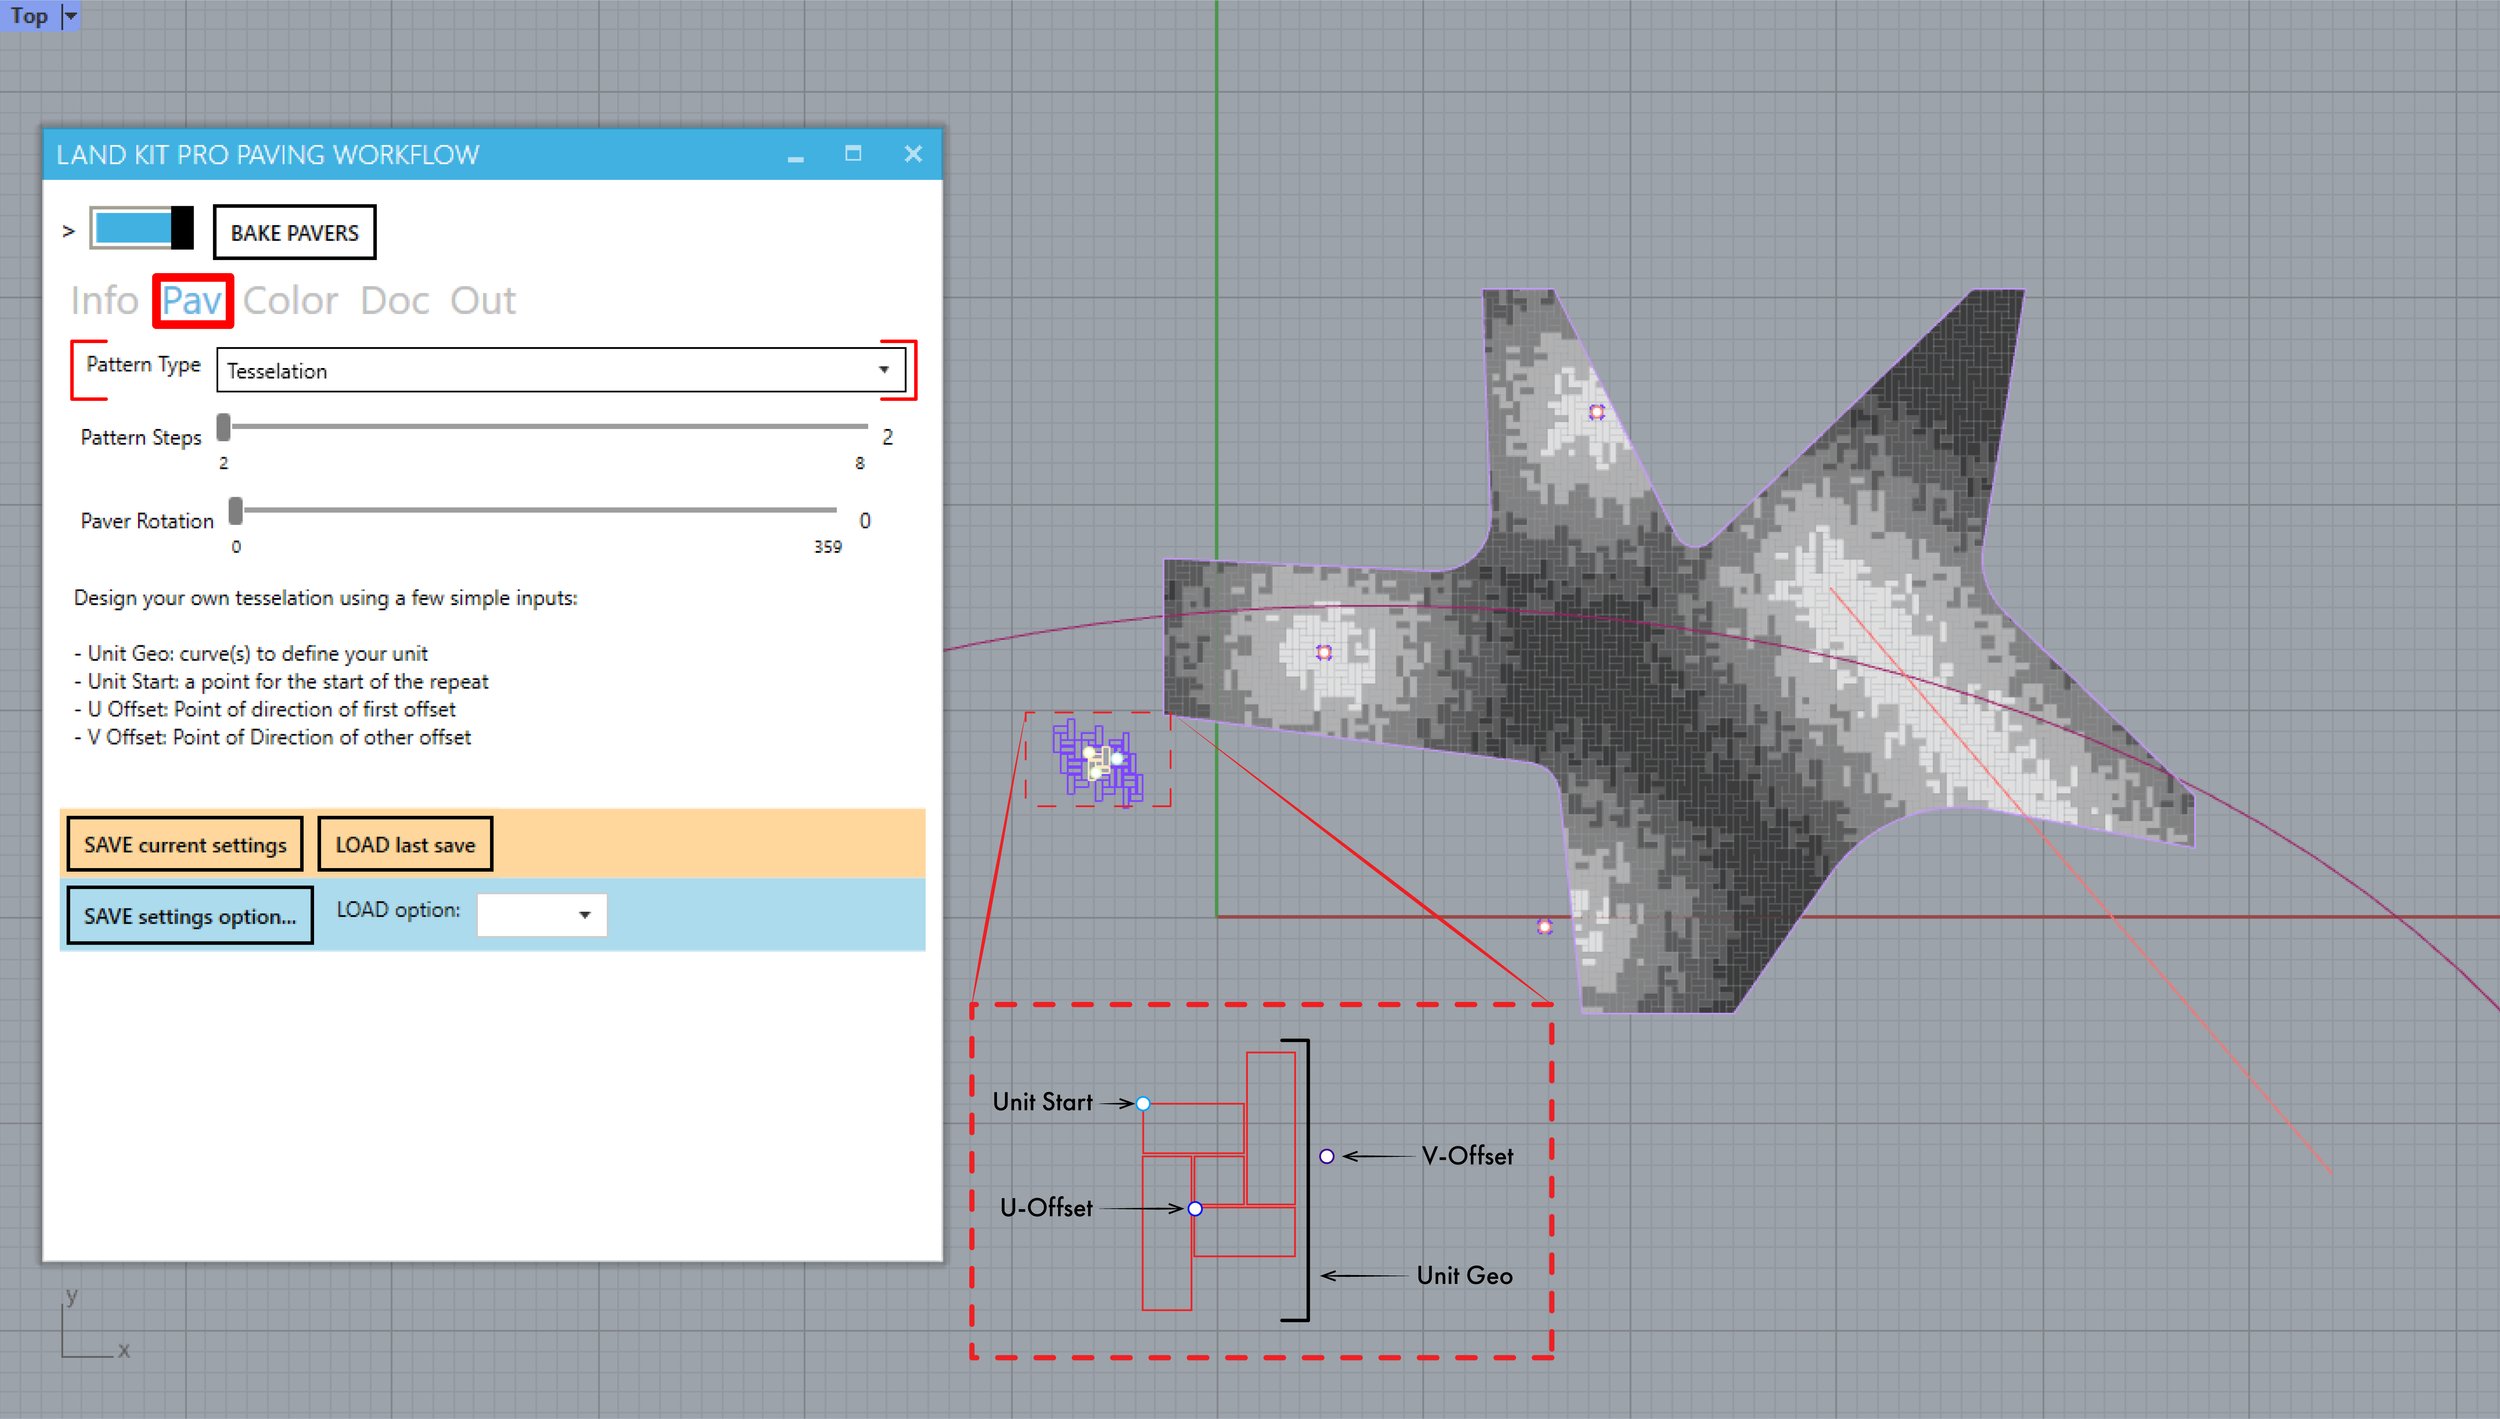
Clicking on the Pav tab will allow you to customize your pavers. An easy-to-use dropdown menu will allow you to select from a variety of common patterns such as hexagonal grids, rows, herringbone, and more. Sliders located just below allow you to tweak paver length and width, as well as the distance between pavers.


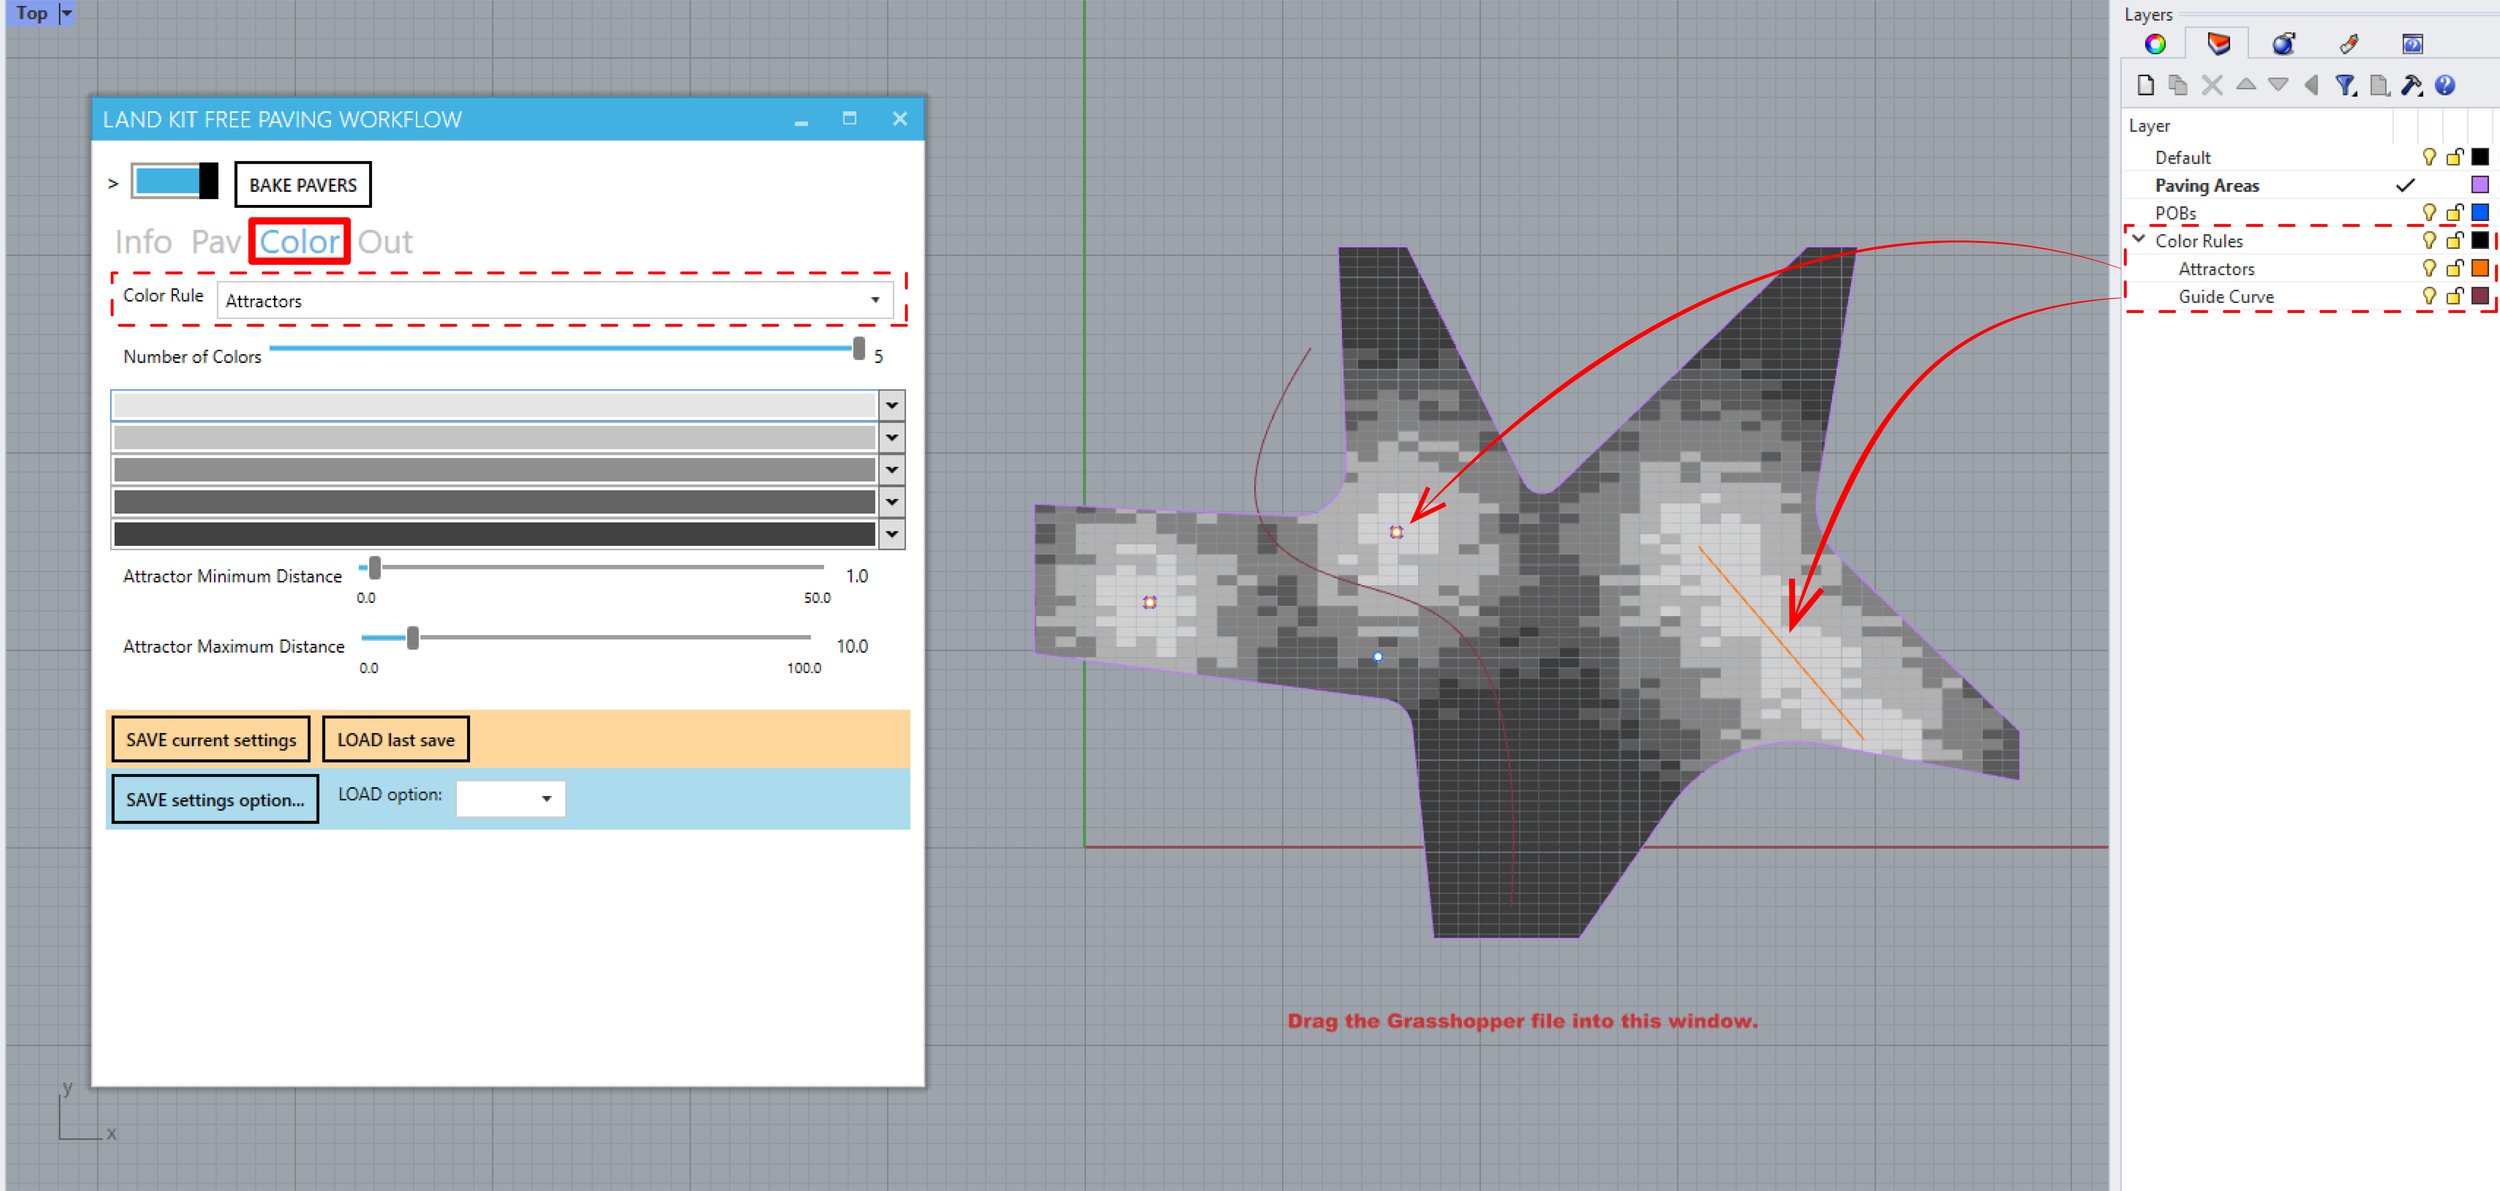
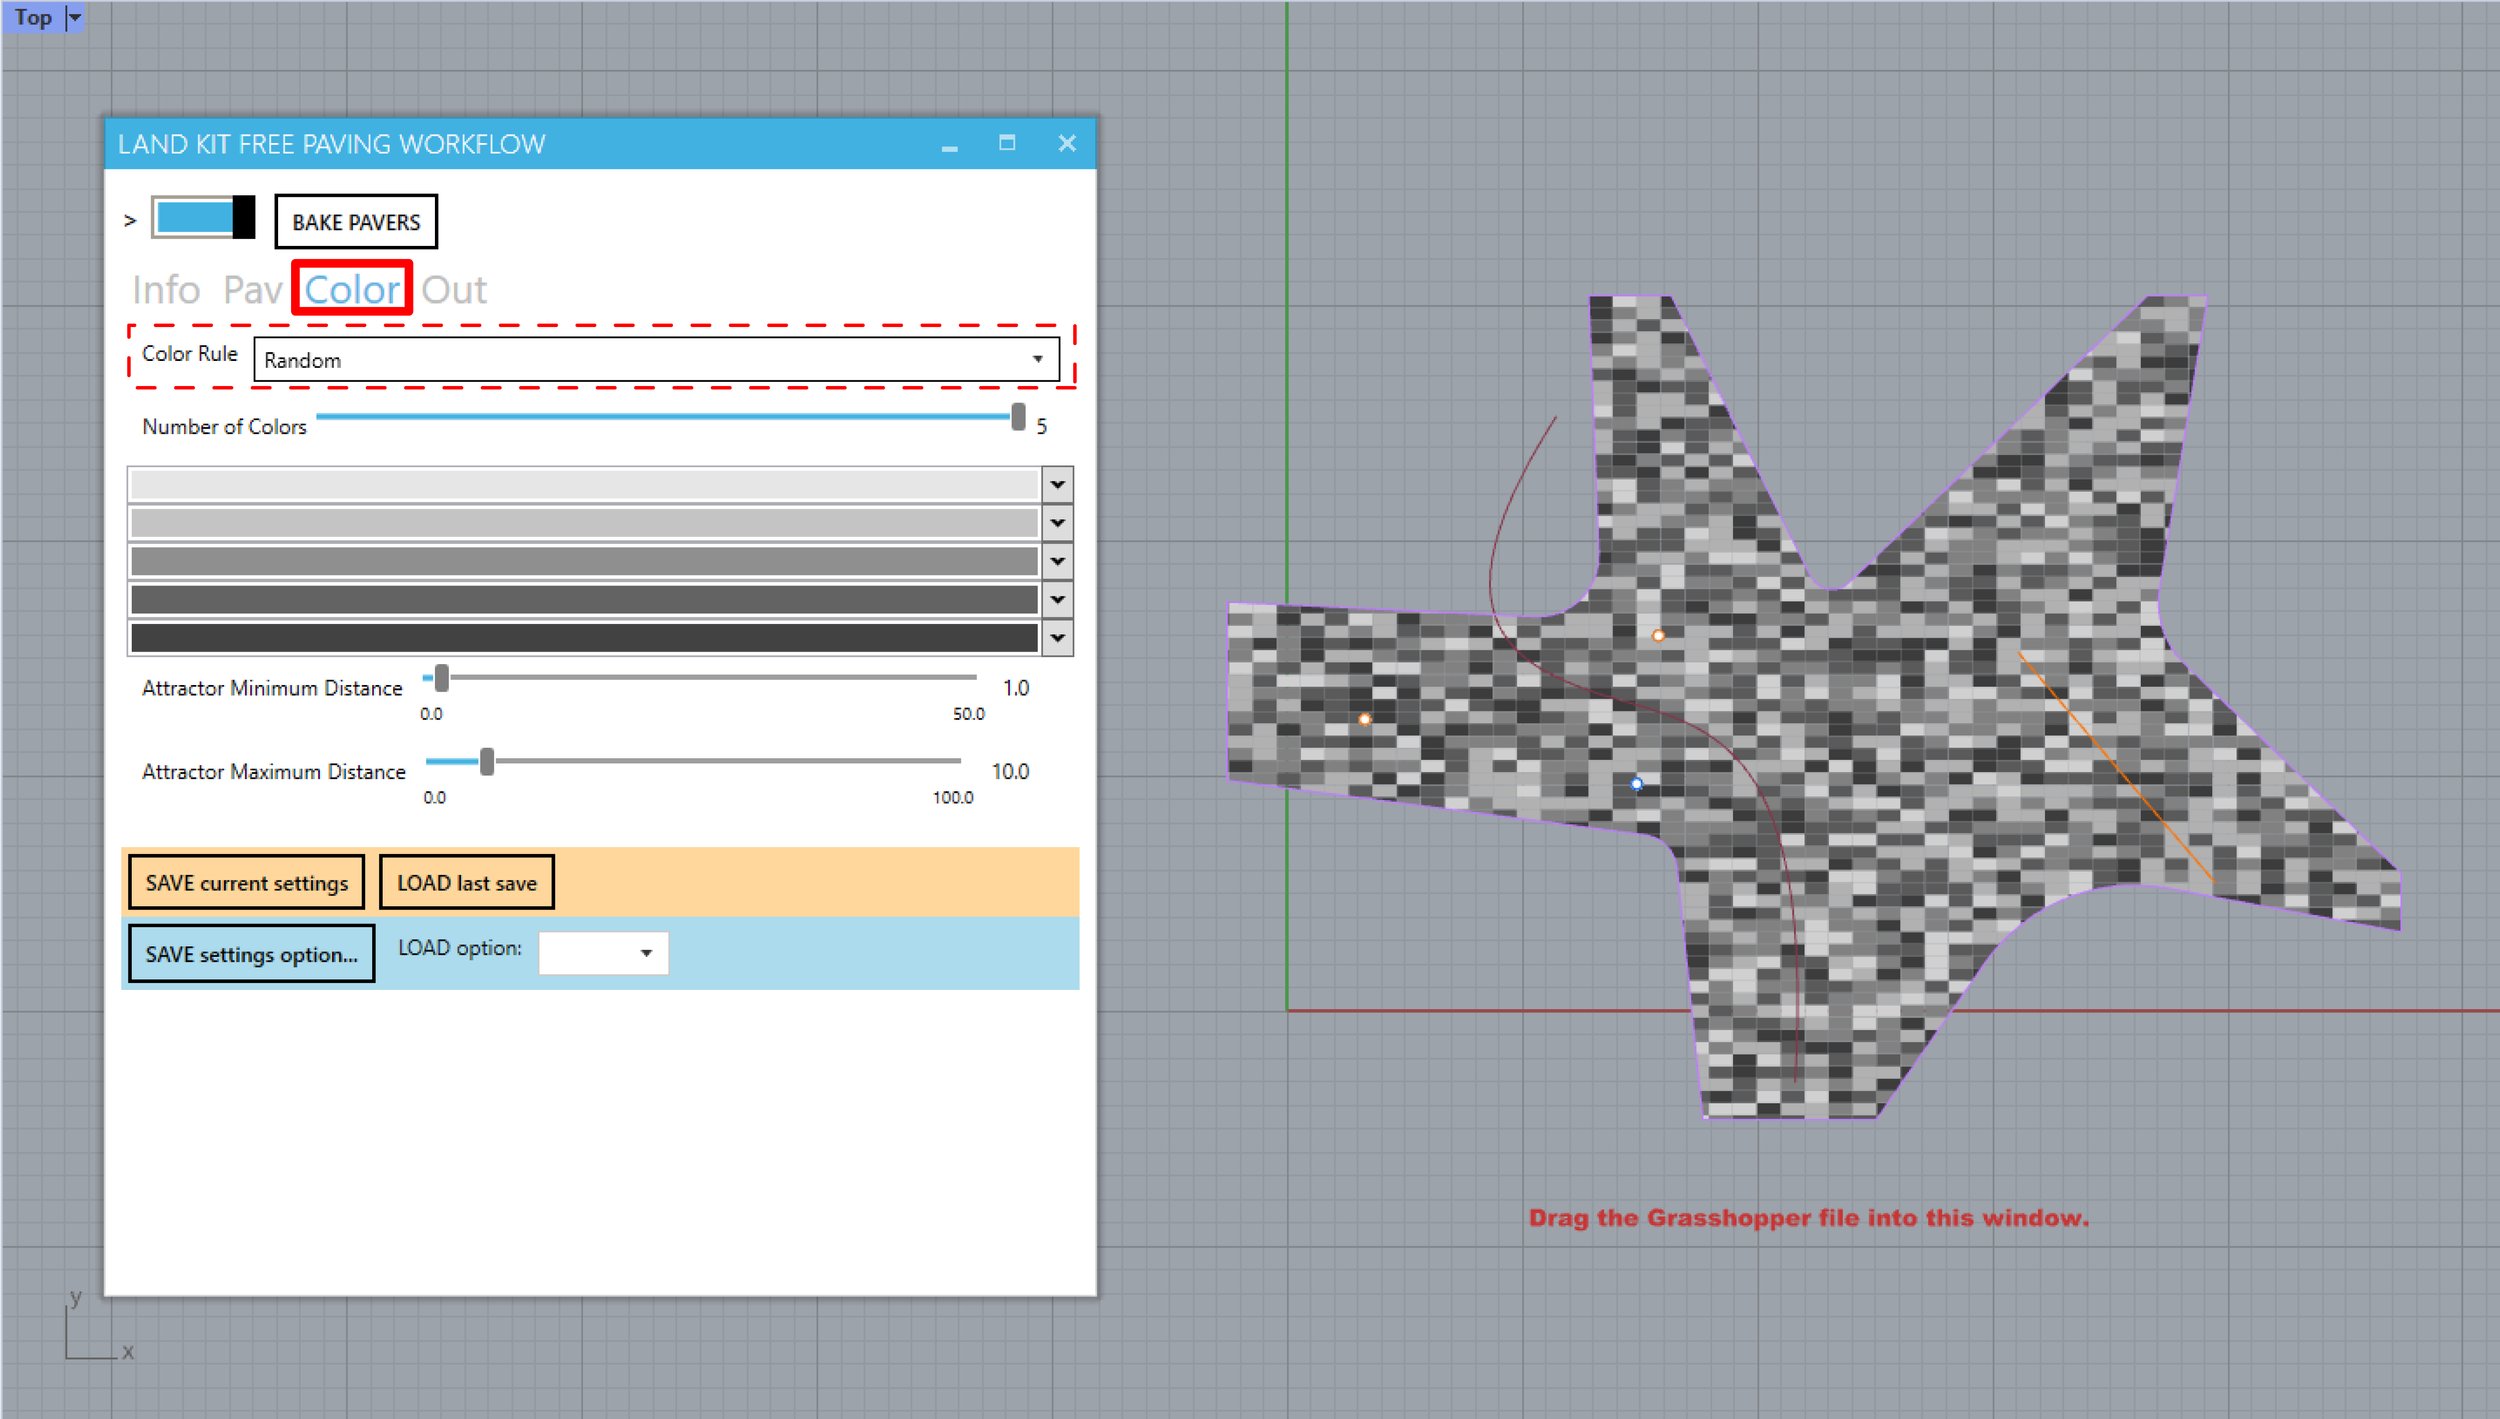
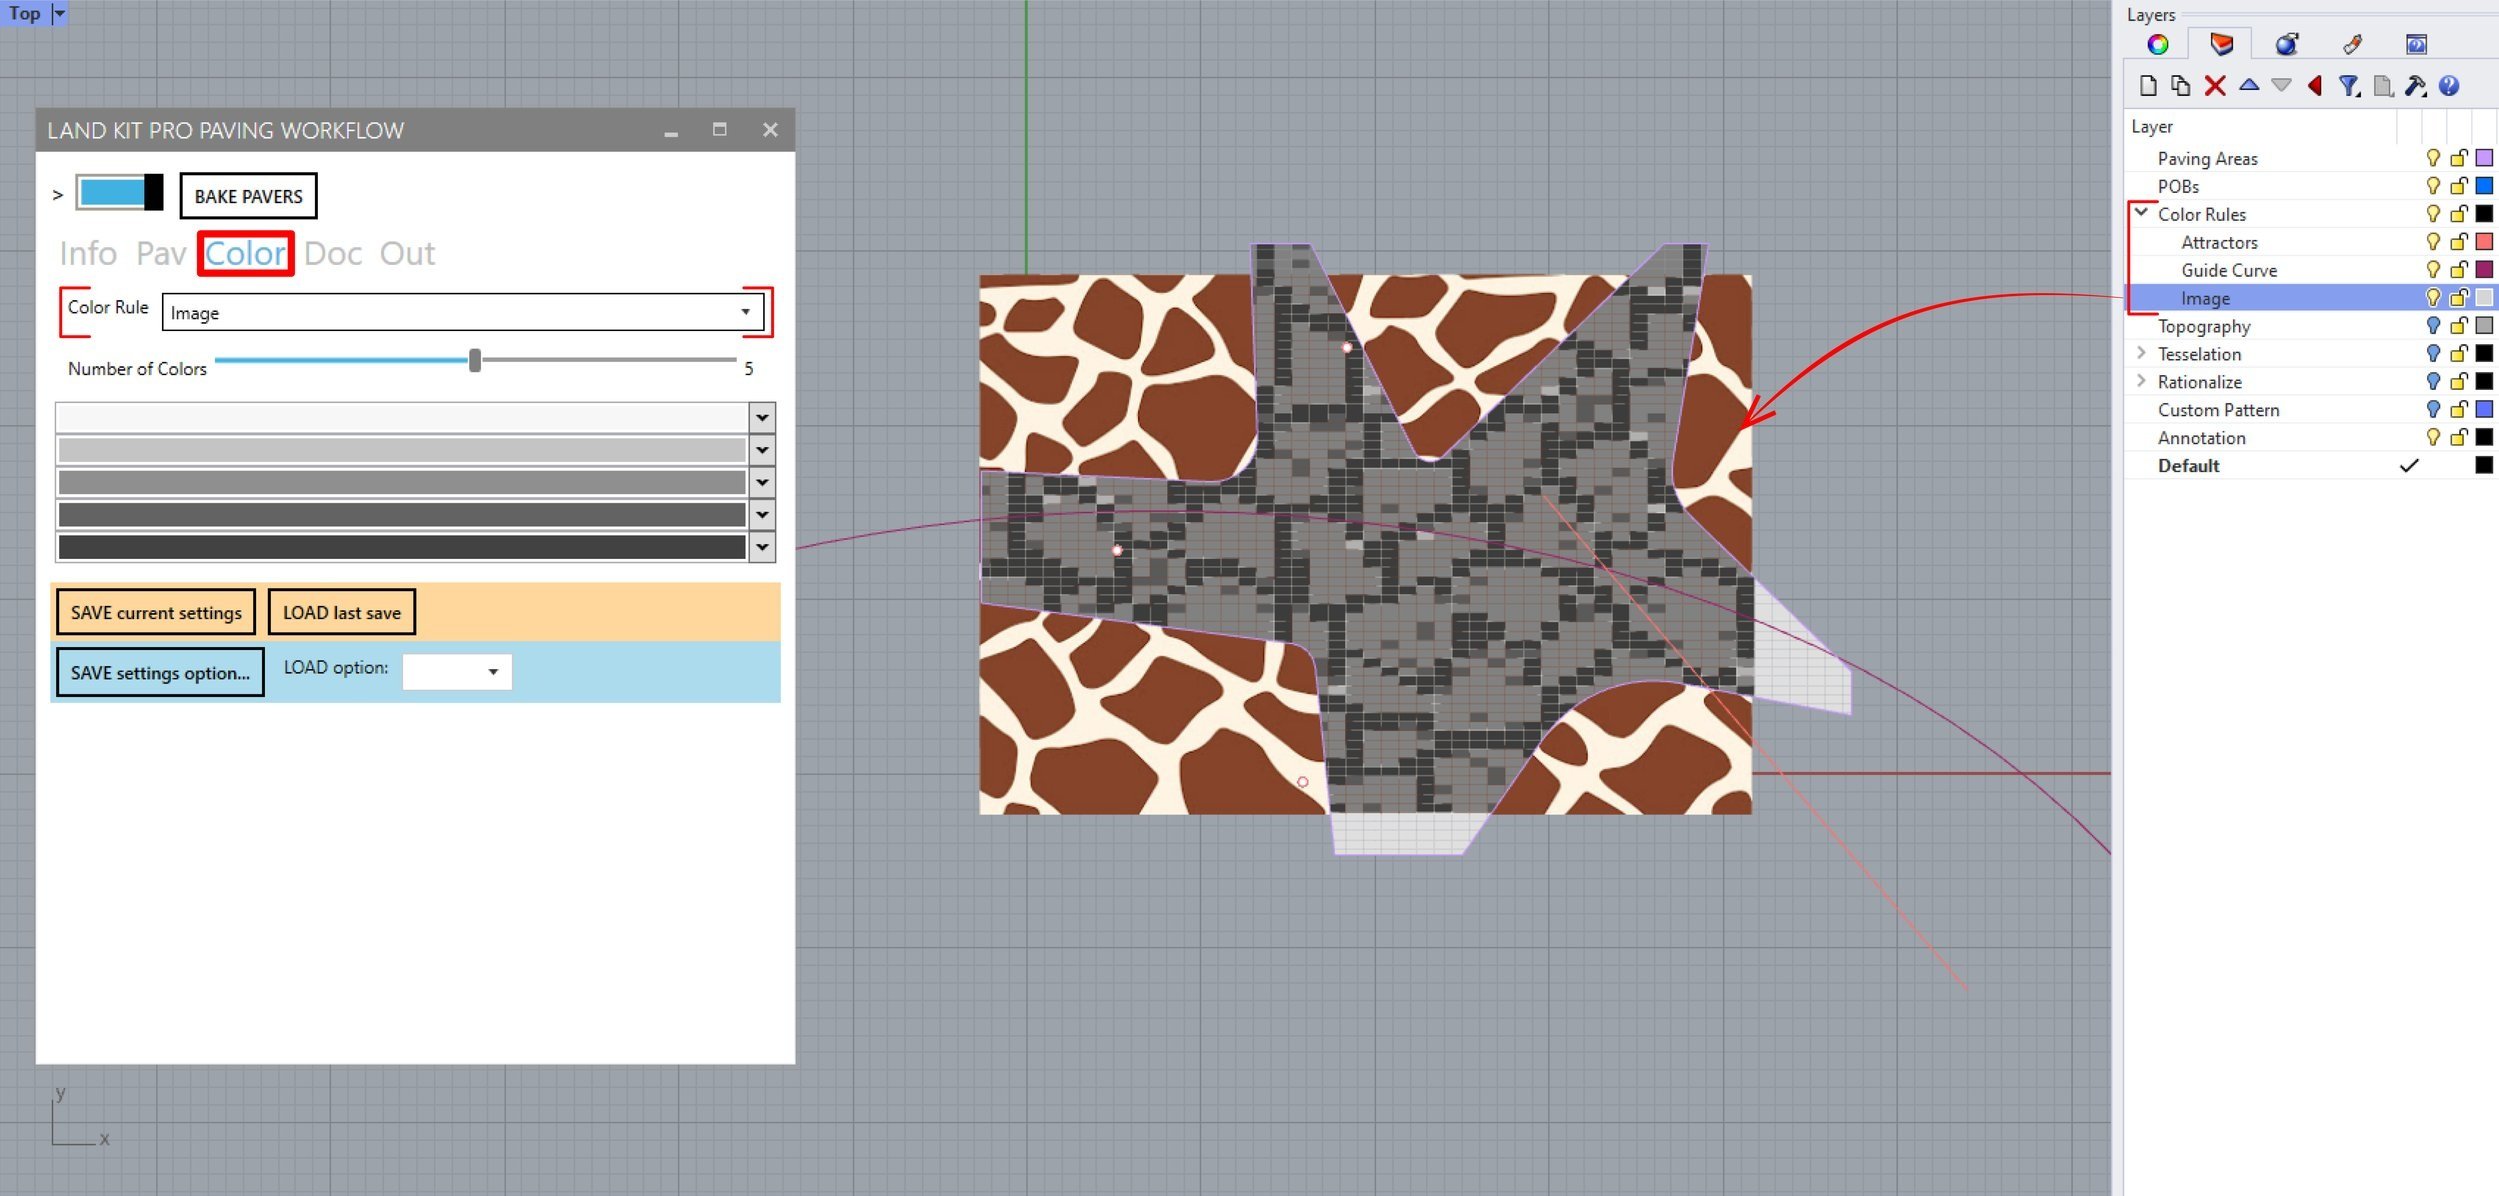
Seamless Color Patterns
The Color tab gives you various options for changing the color pattern of your pavers, such as applying a simple gradient or using geometry to dictate its location. To use geometry, or attractors, simply add points and curves to the Attractors layer. Changing the minimum and maximum values of the Attractors sliders will result in your attractors having more or less influence over your color pattern. If you’re stumped on applying color to your paving patterns, the “Random” and “Gradient” options in the Color Rule dropdown menu will quickly help you iterate ideas.

From Workflow to Rhino
Once you’re happy with your paving pattern, head over to the Out tab. Here, you can either save the latest parameters as an Option or “Bake” your design into Rhino. Saving your option allows you to return to it later and start a separate iteration, while Baking geometry will bring it into the Rhino file, making it easier to export to CAD. With saving or baking, it’s as easy as clicking a button.

Paving like a Pro
Pro Workflows add more power without any extra complexity. Upgrade today to access these features.
Pro Features Include:
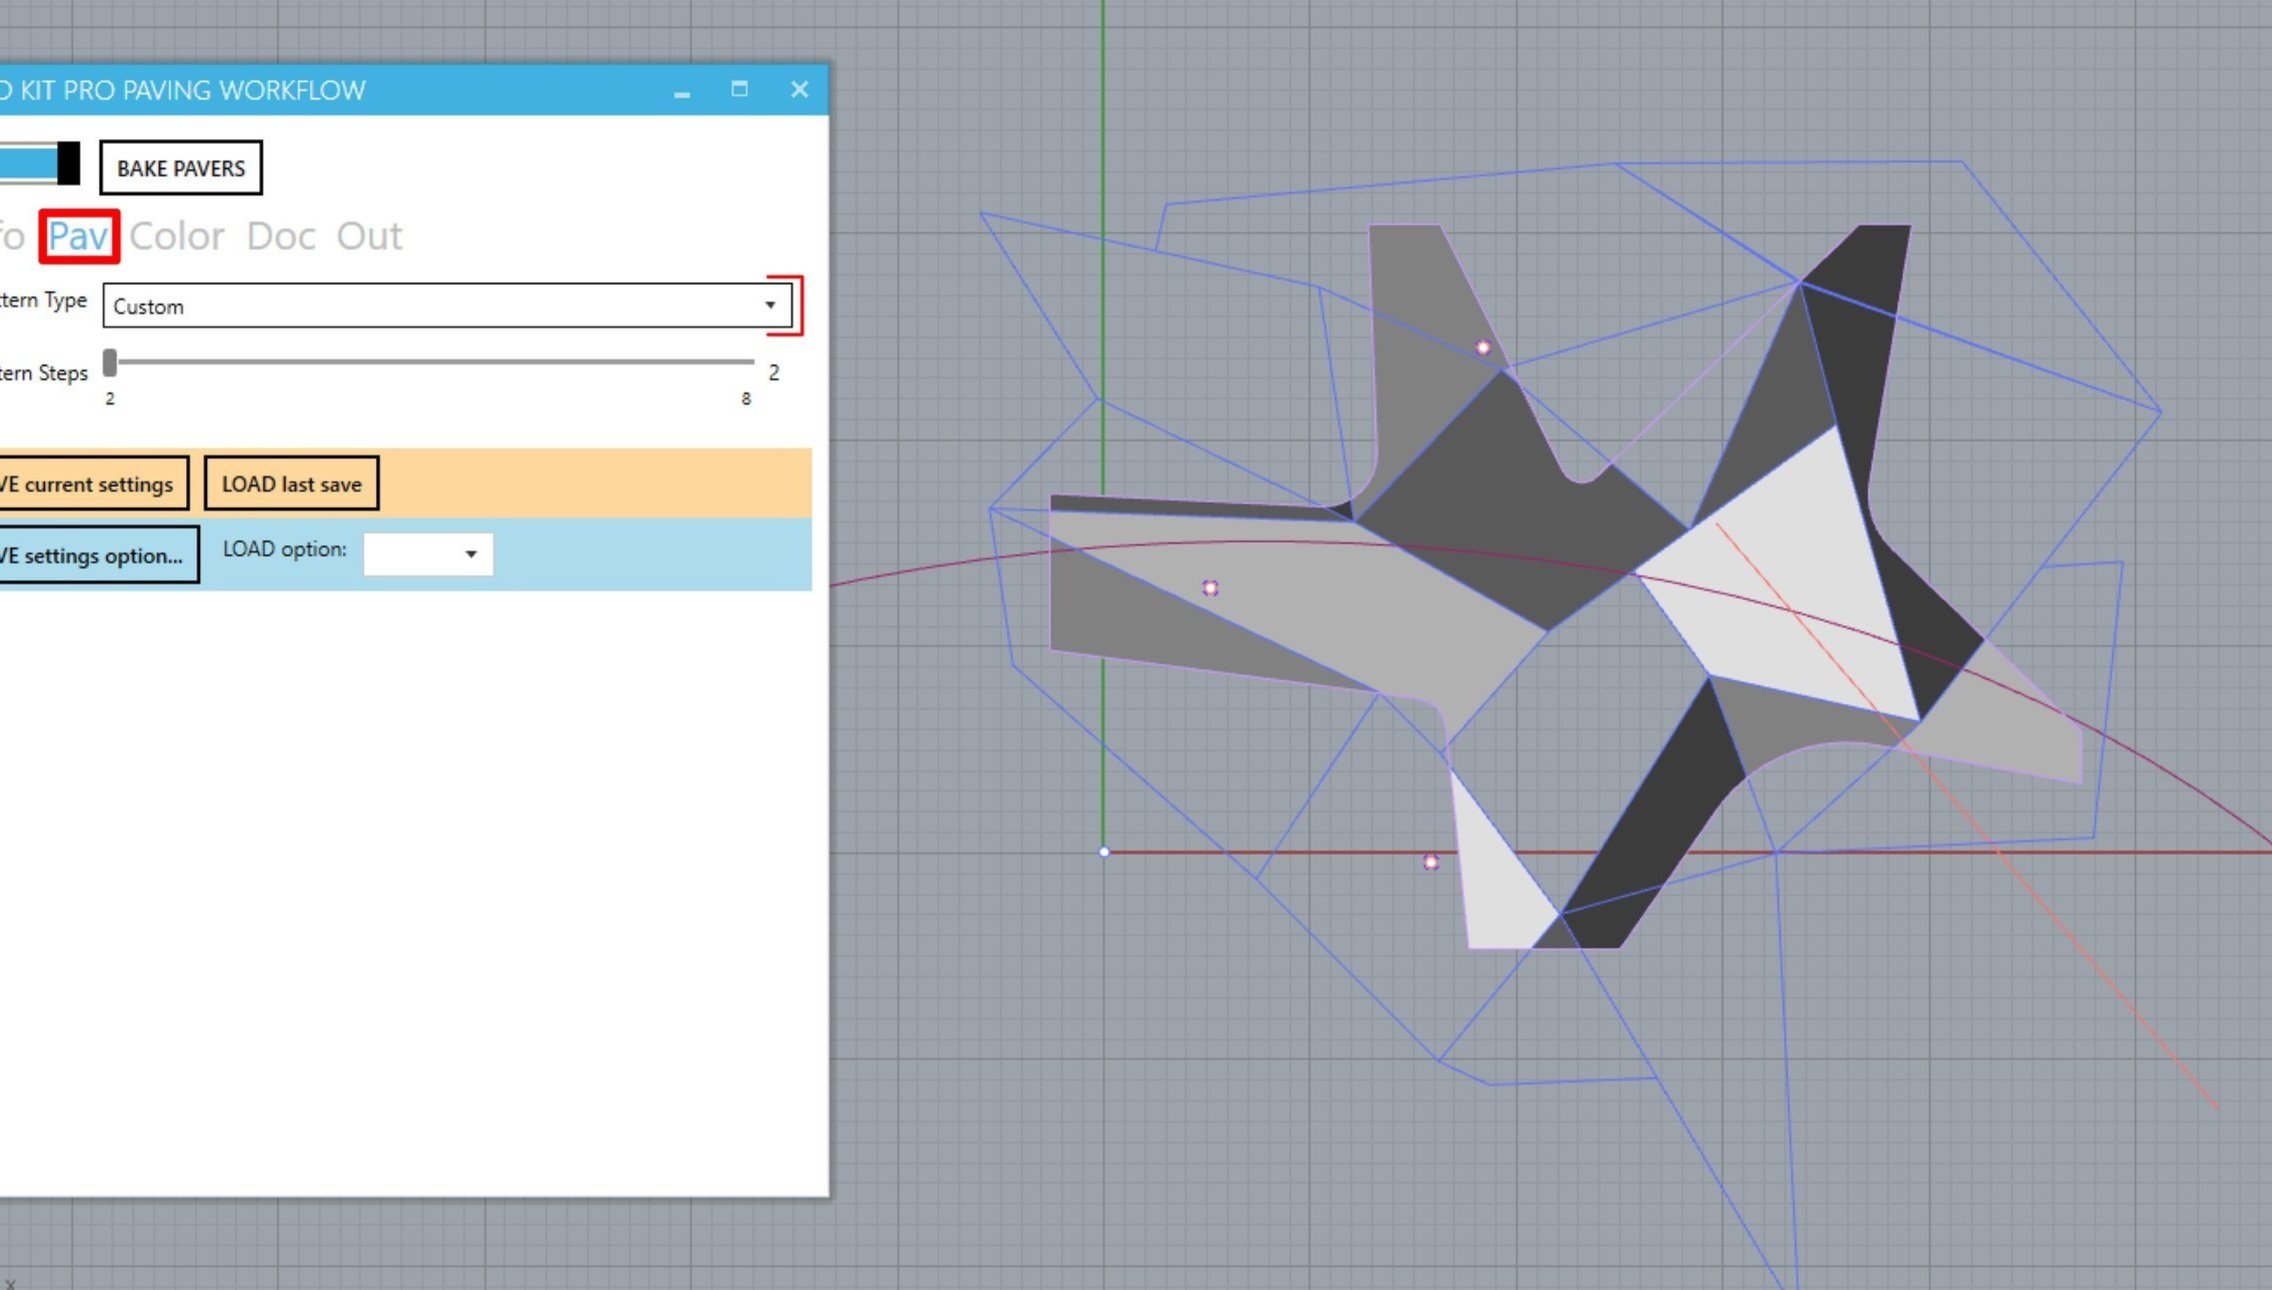
Create more custom paving patterns using the Custom or Tessellation paving options.
Create custom color patterns from images using the Image color rule.
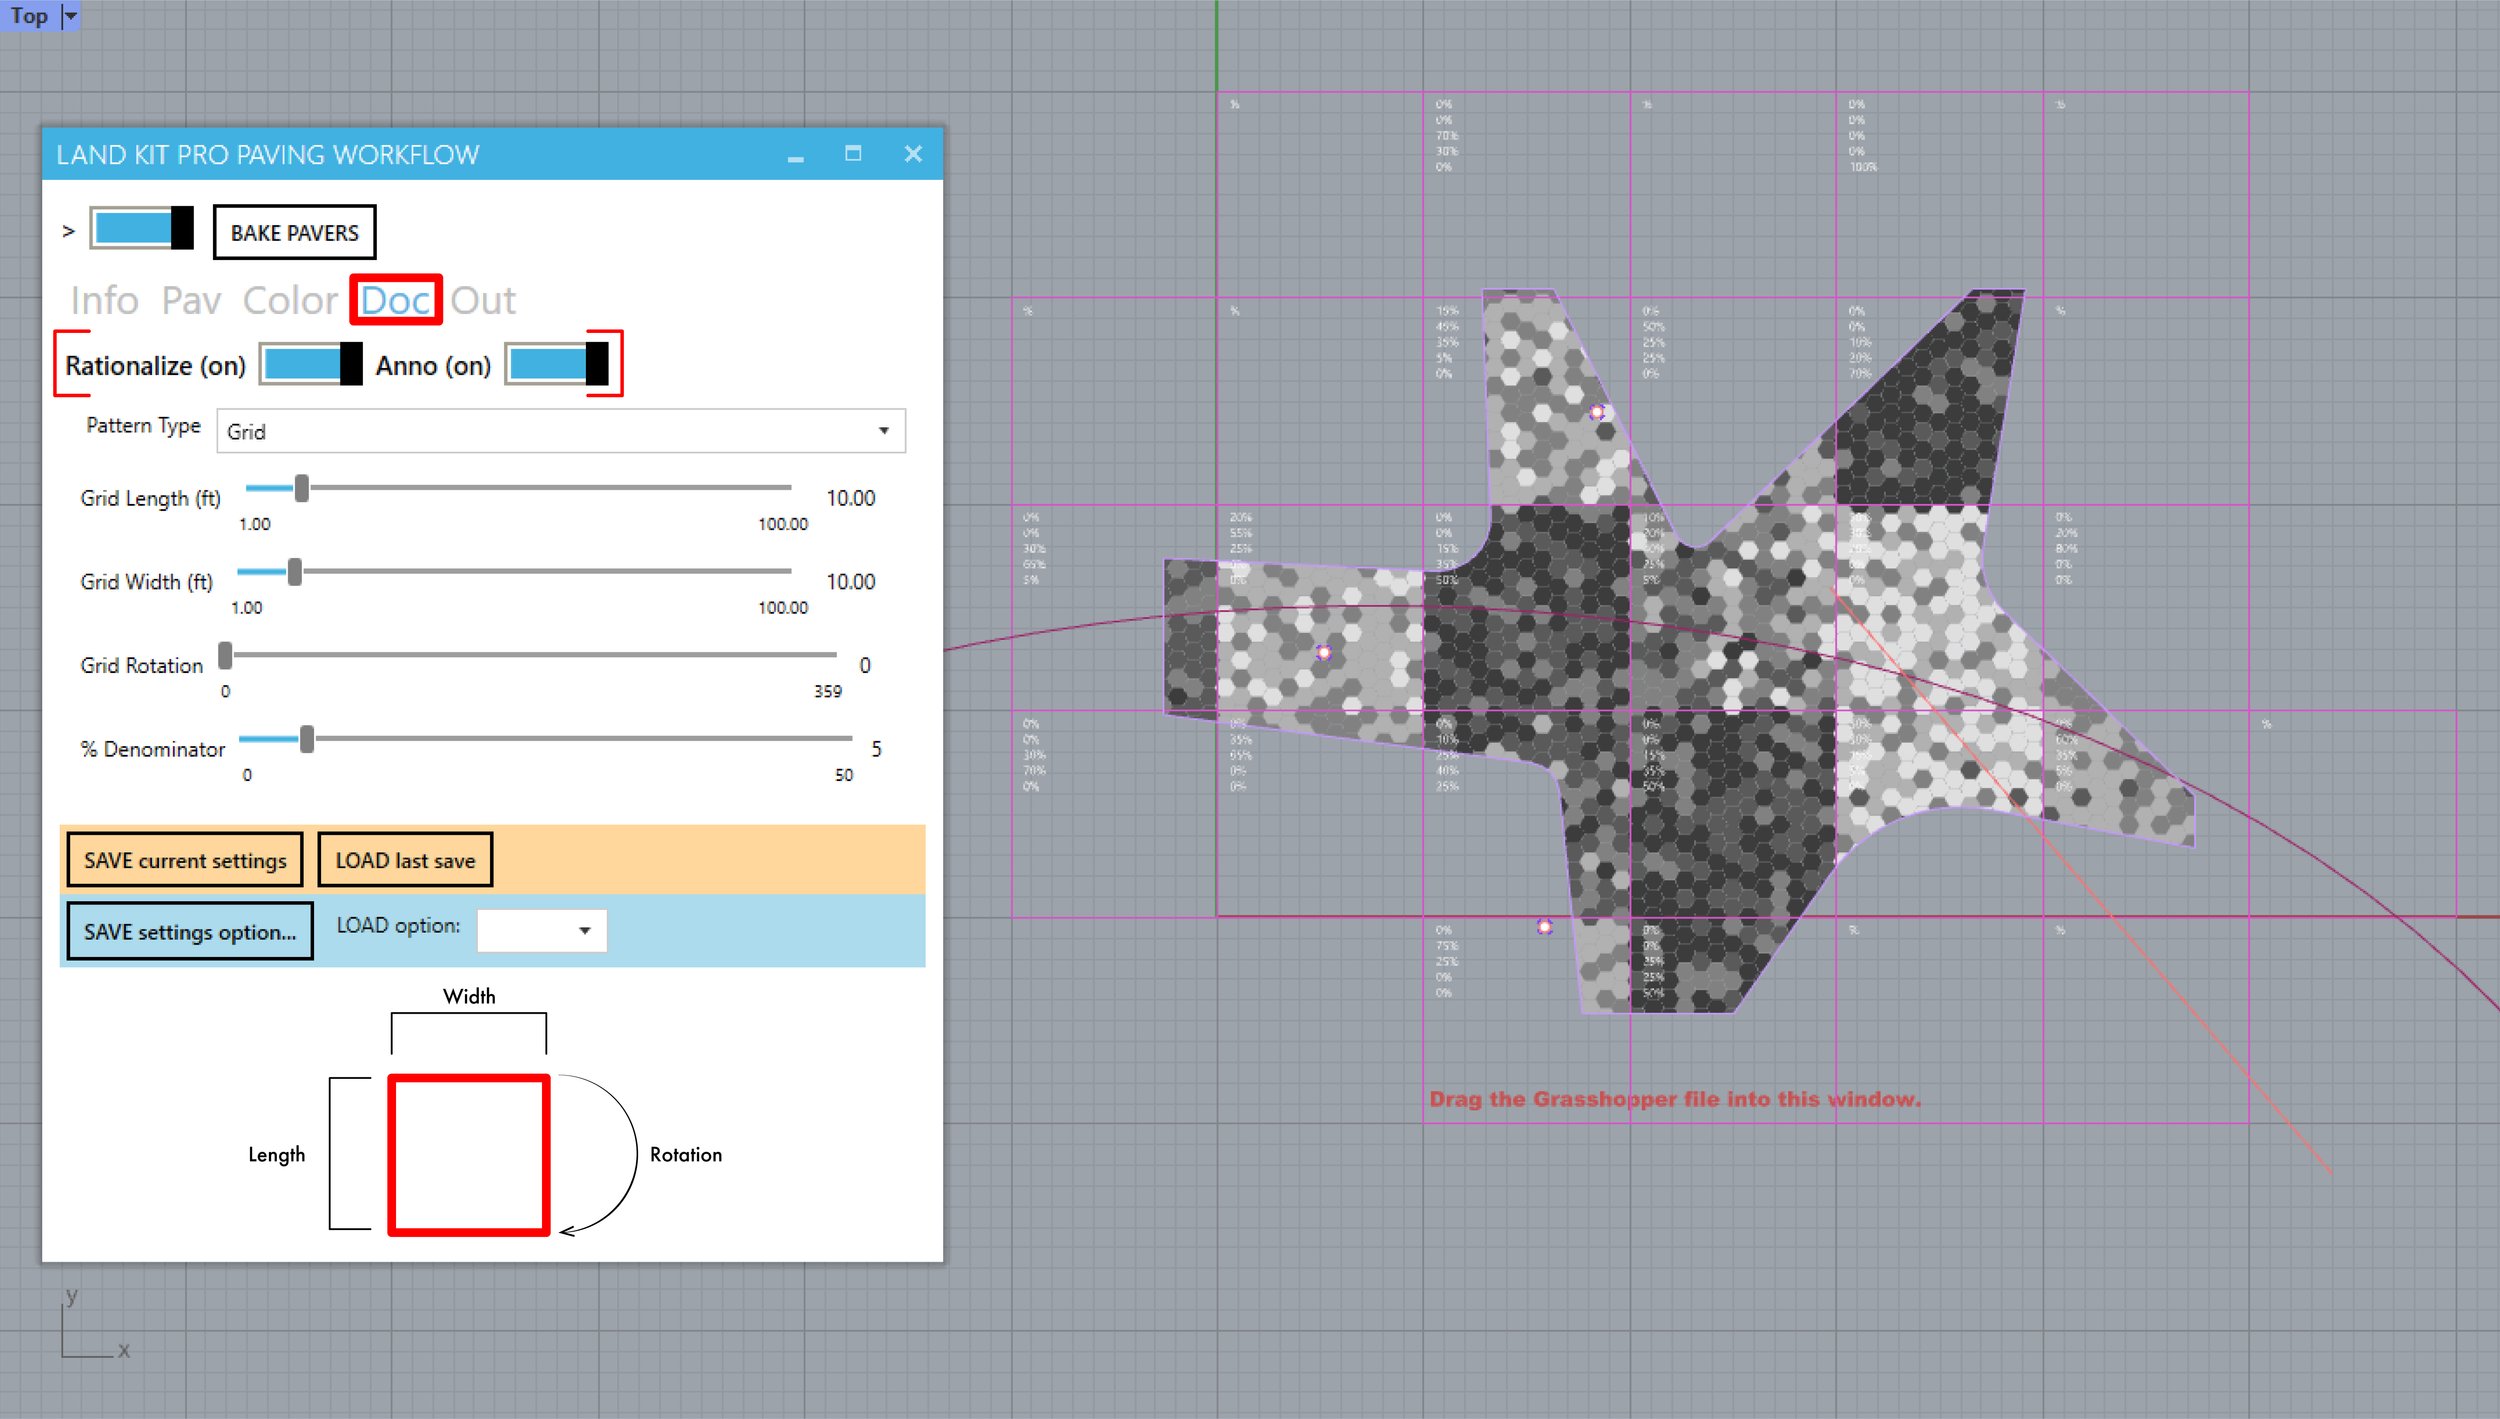
Quickly rationalize your custom paving patterns for documentation in the Doc tab.
Export your paving pattern as hatches for CAD and Illustrator drawings.
Project your paving pattern to topography for epic visualization.
The videos and PDFs will help you get going as well.