
Water Workflows
Dip your toes into Water Workflows from Land Kit.
Starting is easy - and Grasshopper free, ahhh
Download the Free Water Workflow example files, then open the Rhino file first. After that, drag the Grasshopper example file into the Rhino workspace.
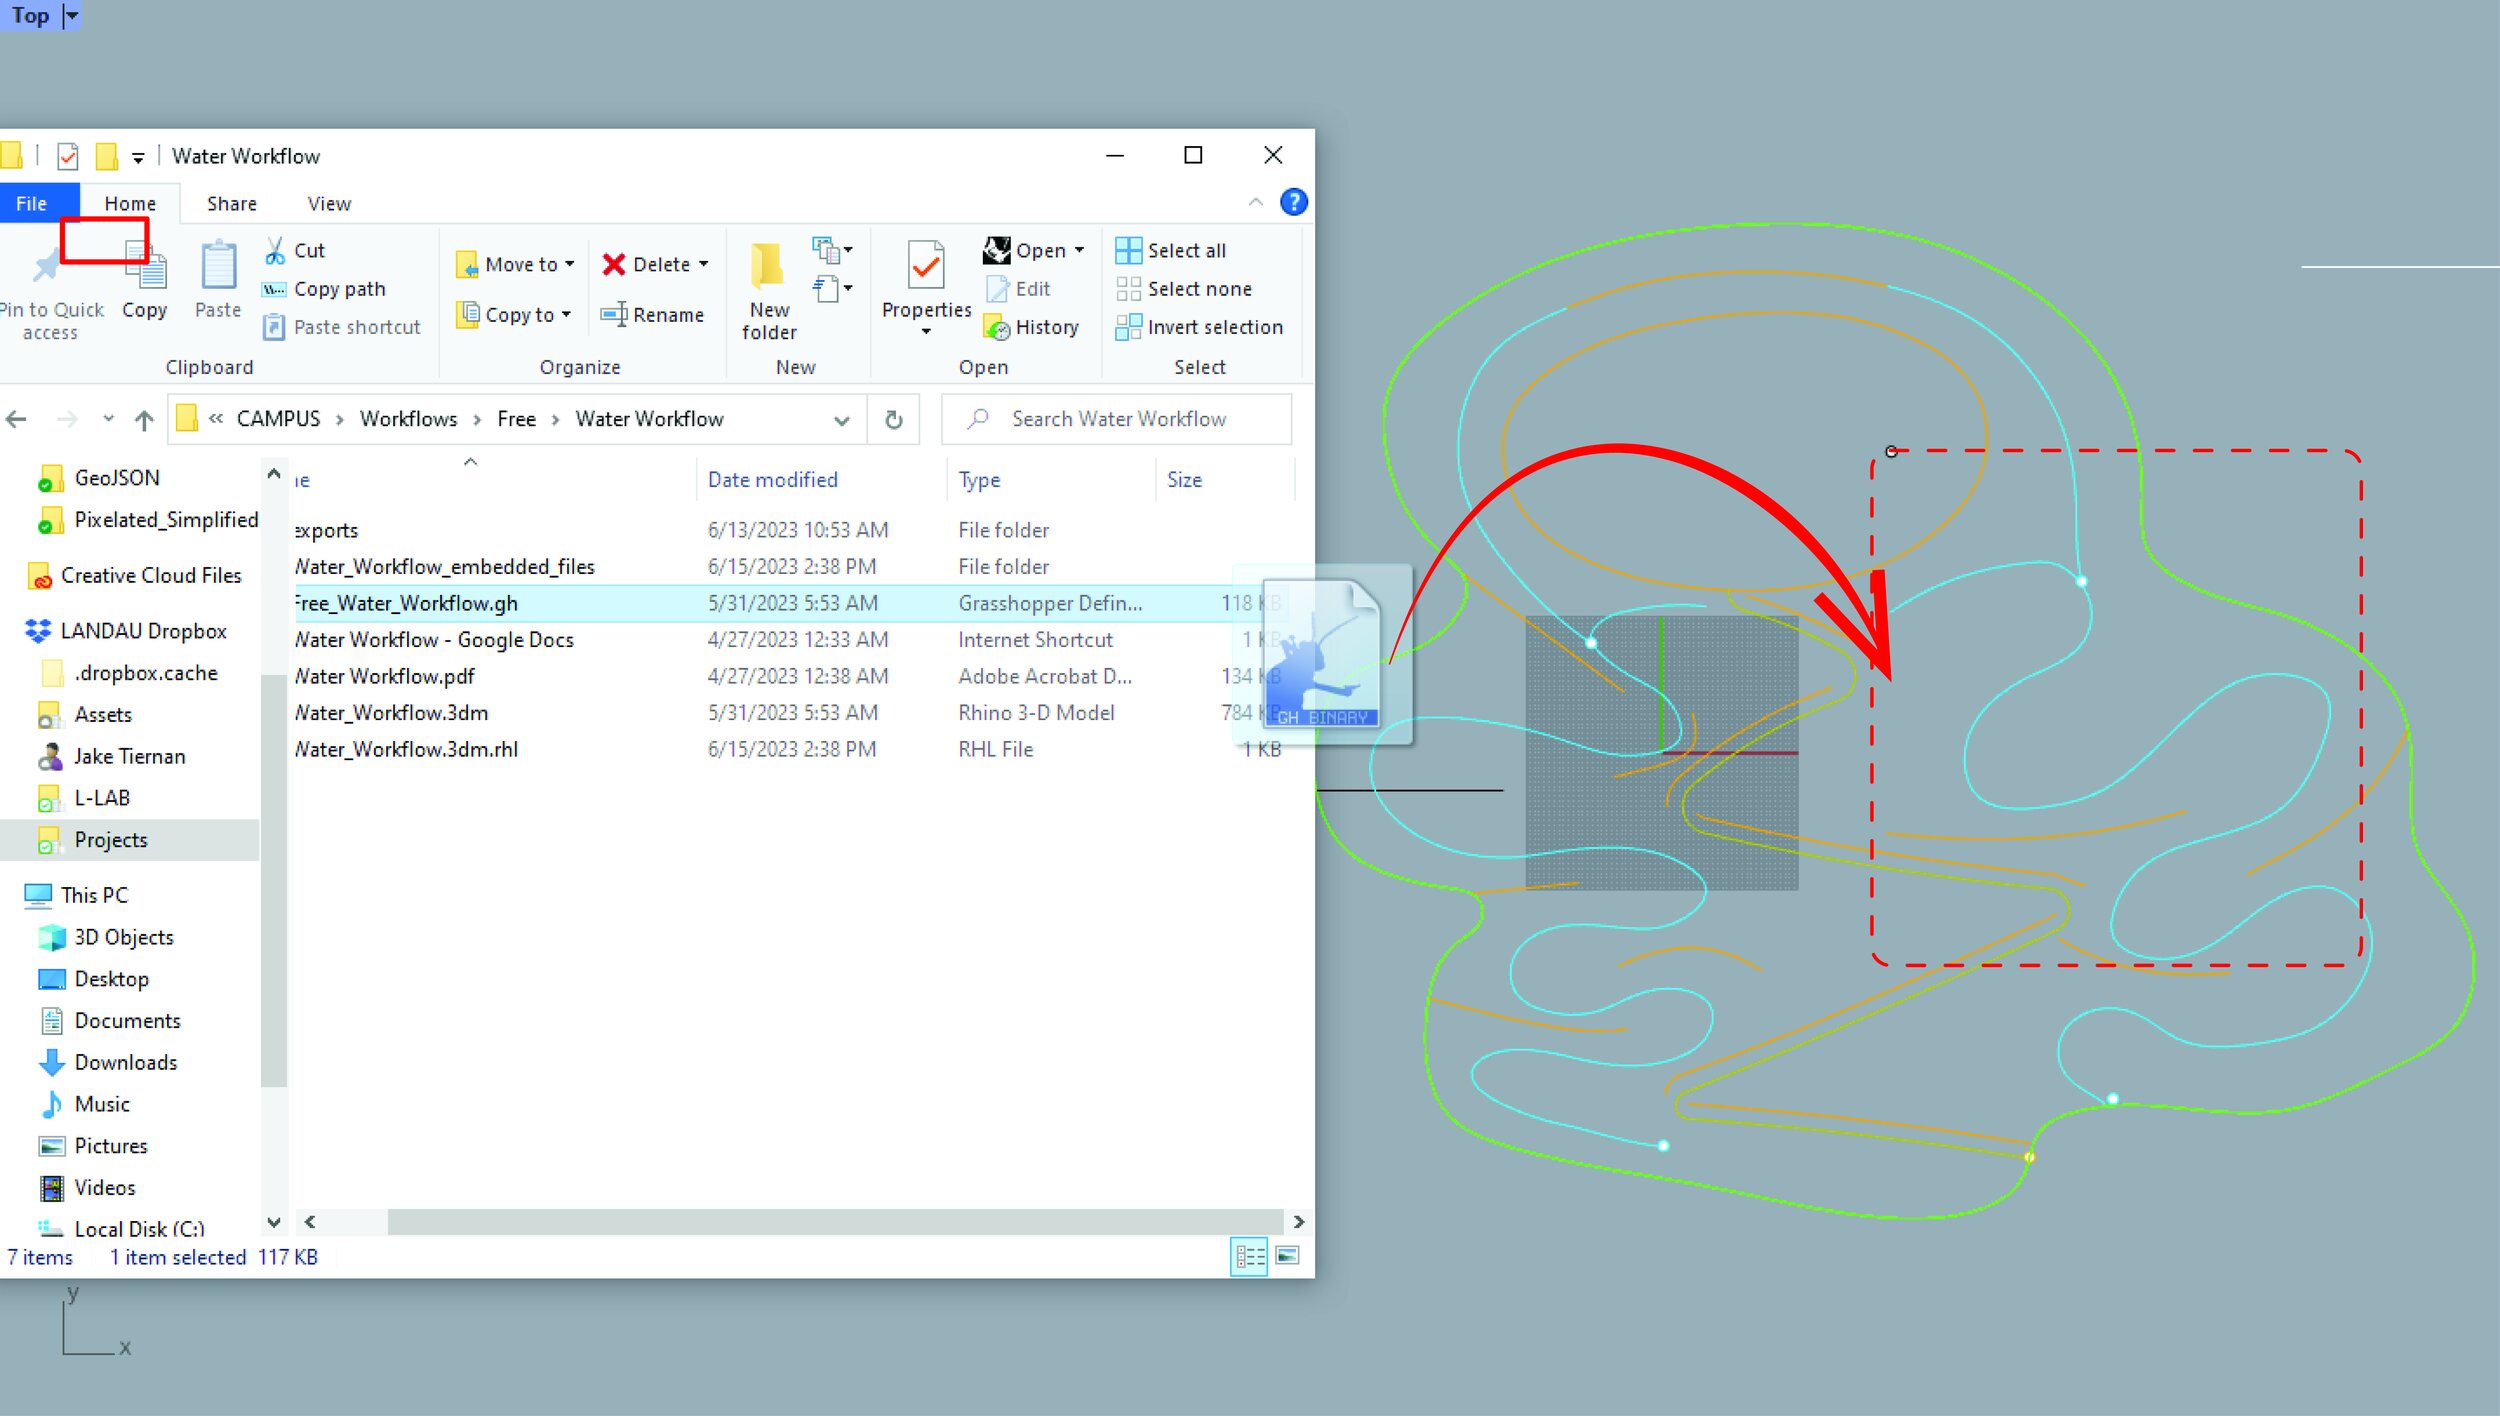
And Voi-la! A panel should open similar to the one below, and the Grasshopper window disappears.
Make sure to read all the text in the Info tab, as it will tell you all need to know about where things are located.

Control Topography, Control Water
The Topo tab will appear directly next to the Info tab. Here you can adjust your topography to see how it will impact the flow of water on your site. Quickly iterate different sizes and slopes of swales, paths, and basins by simply moving the sliders or changing simple geometries in Rhino. Land Kit will do the difficult modeling work from there. All you do is provide a centerline or a breakline - and relax.

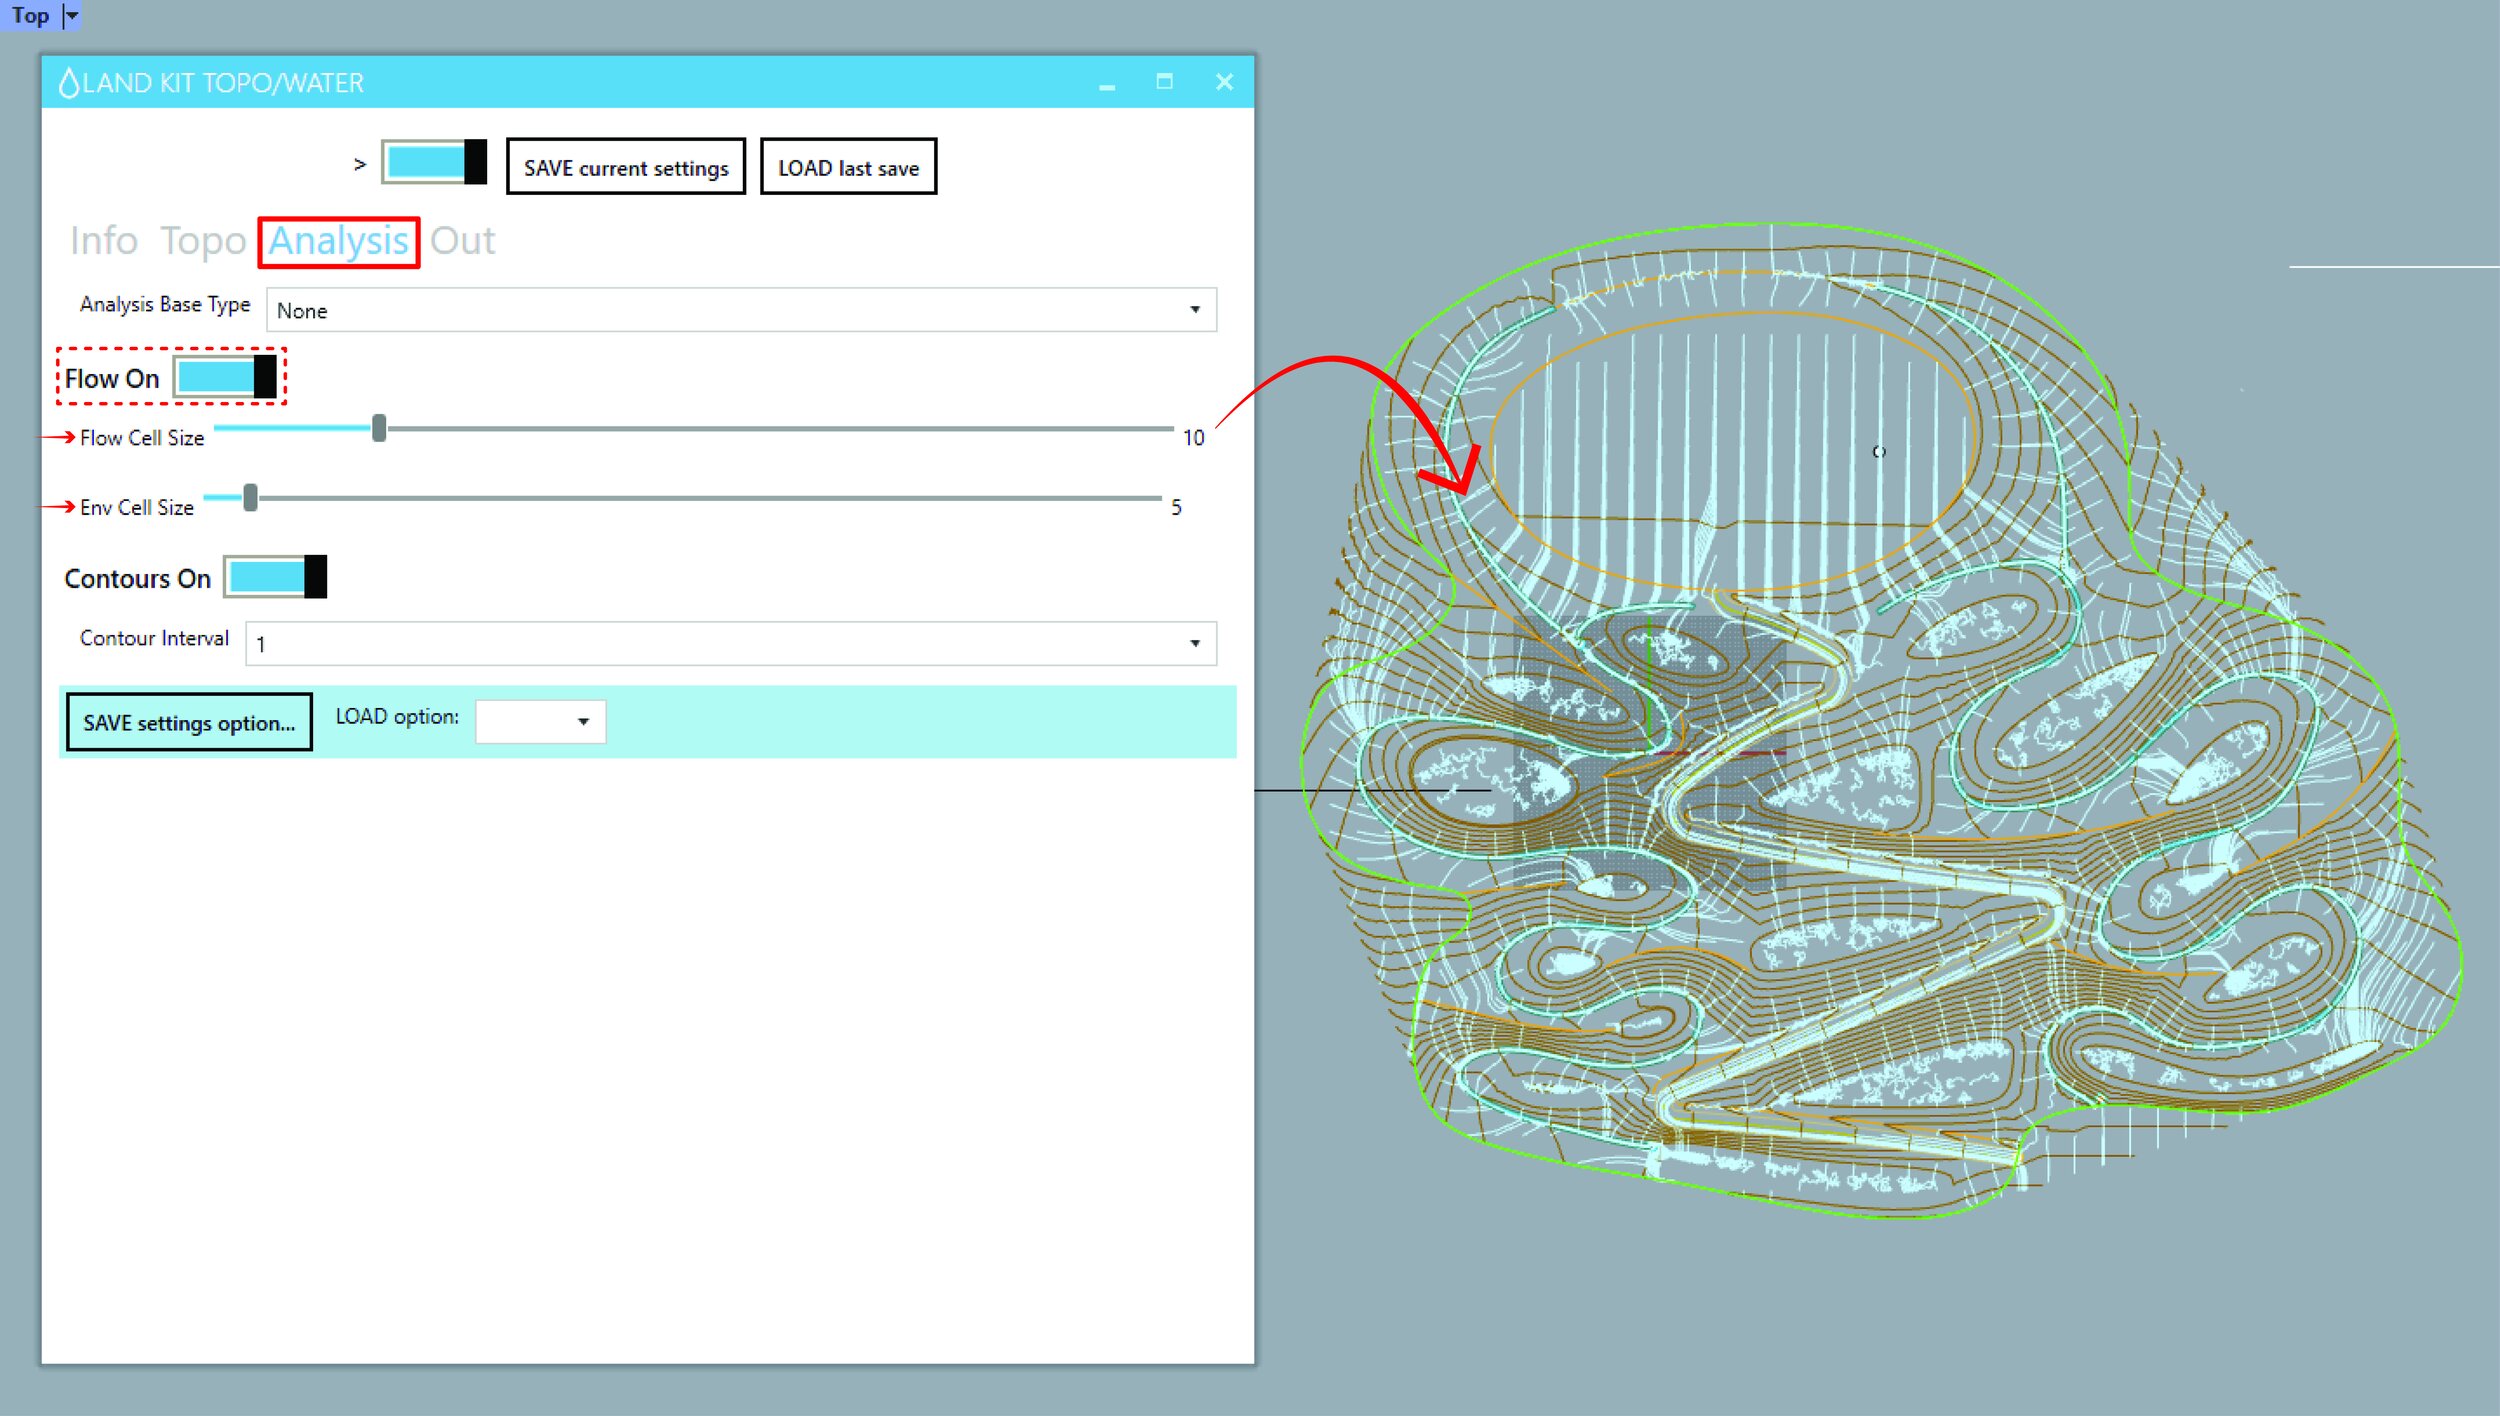
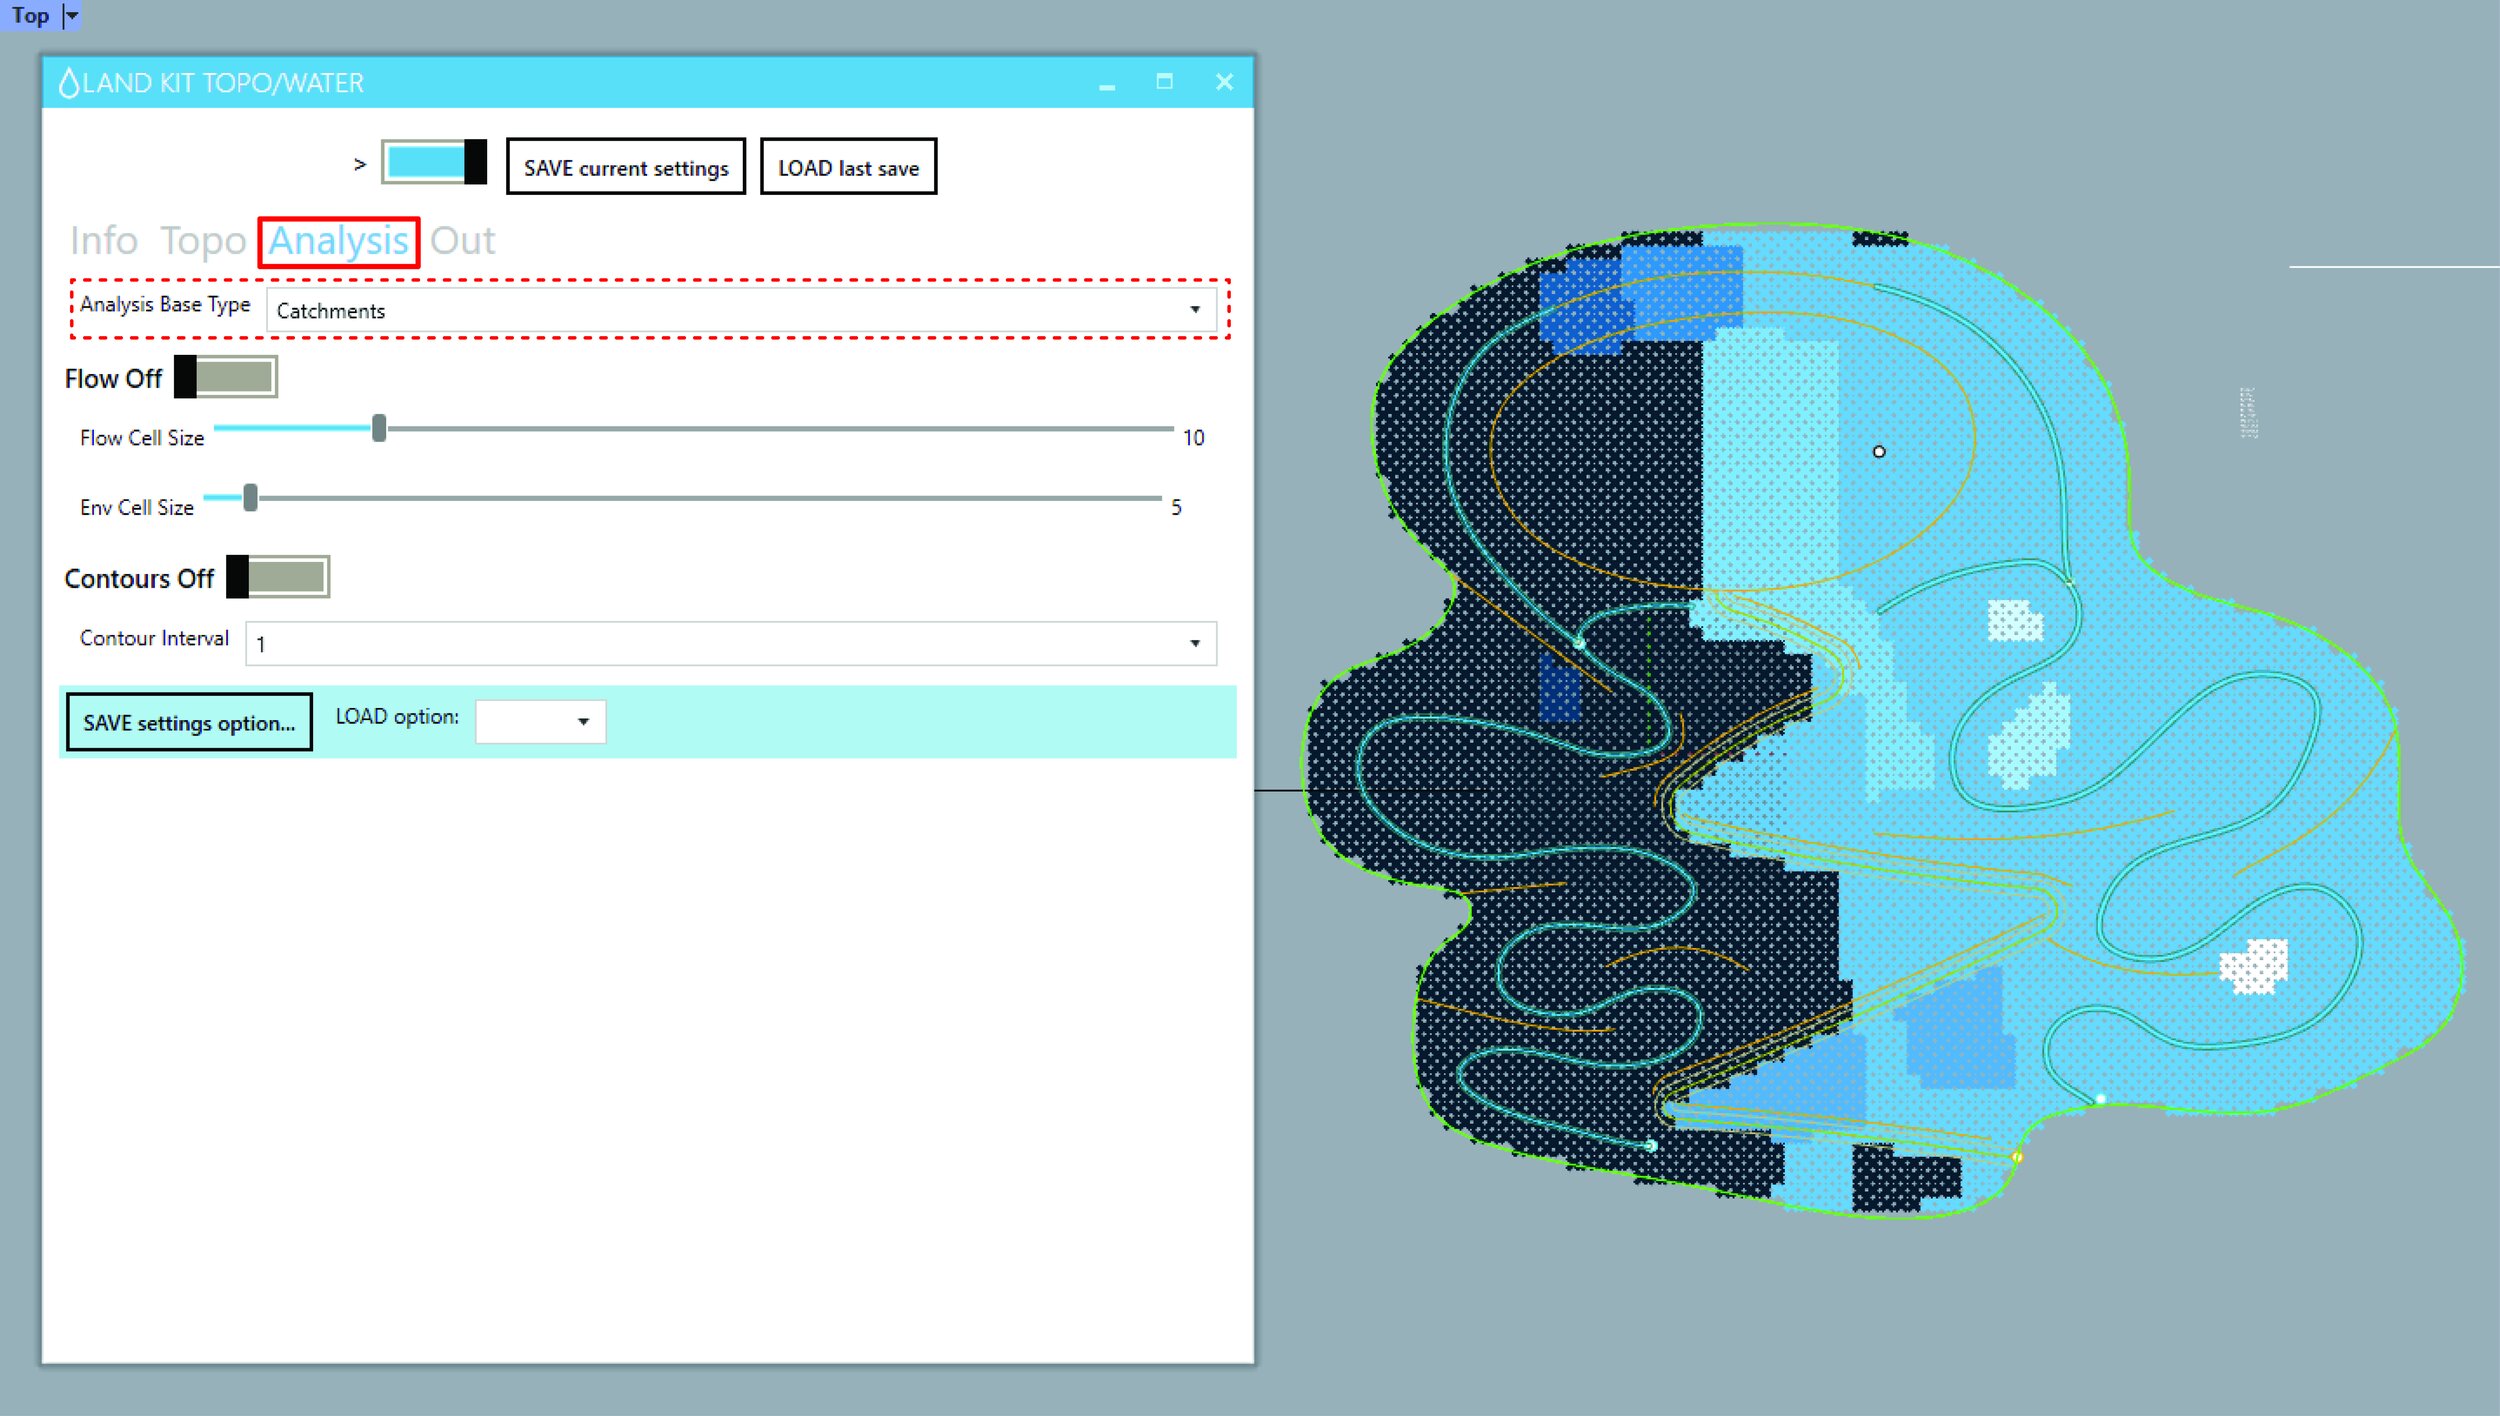
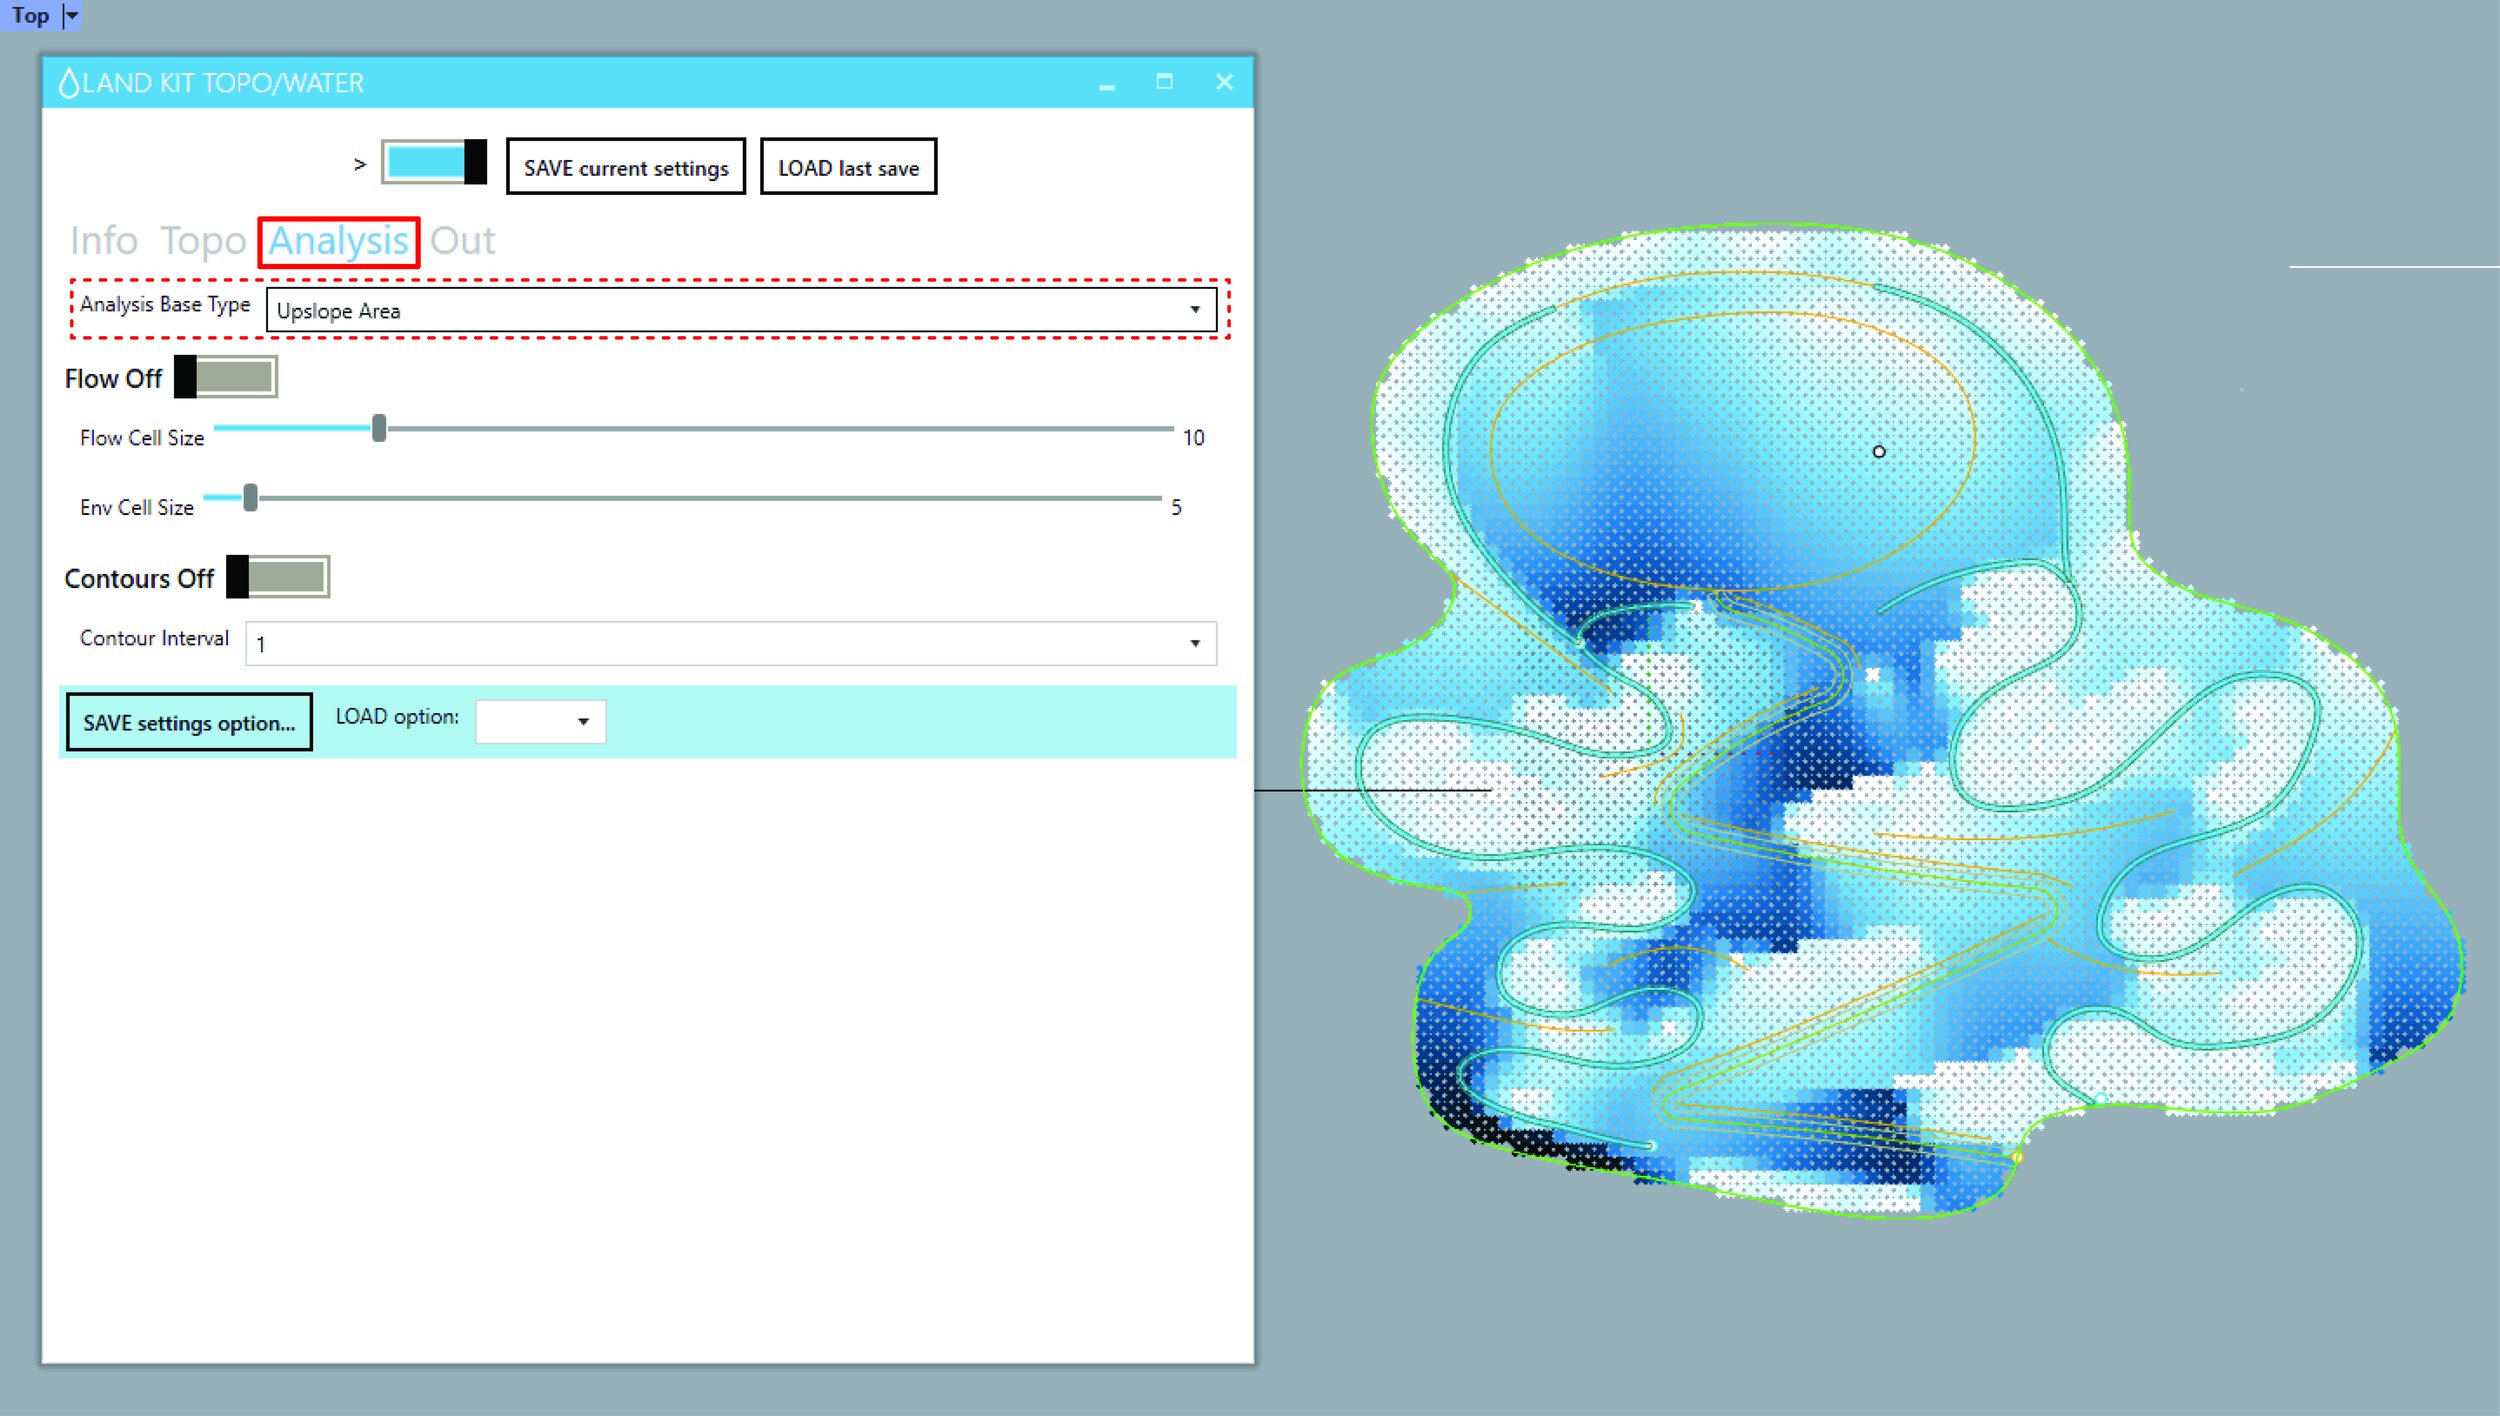
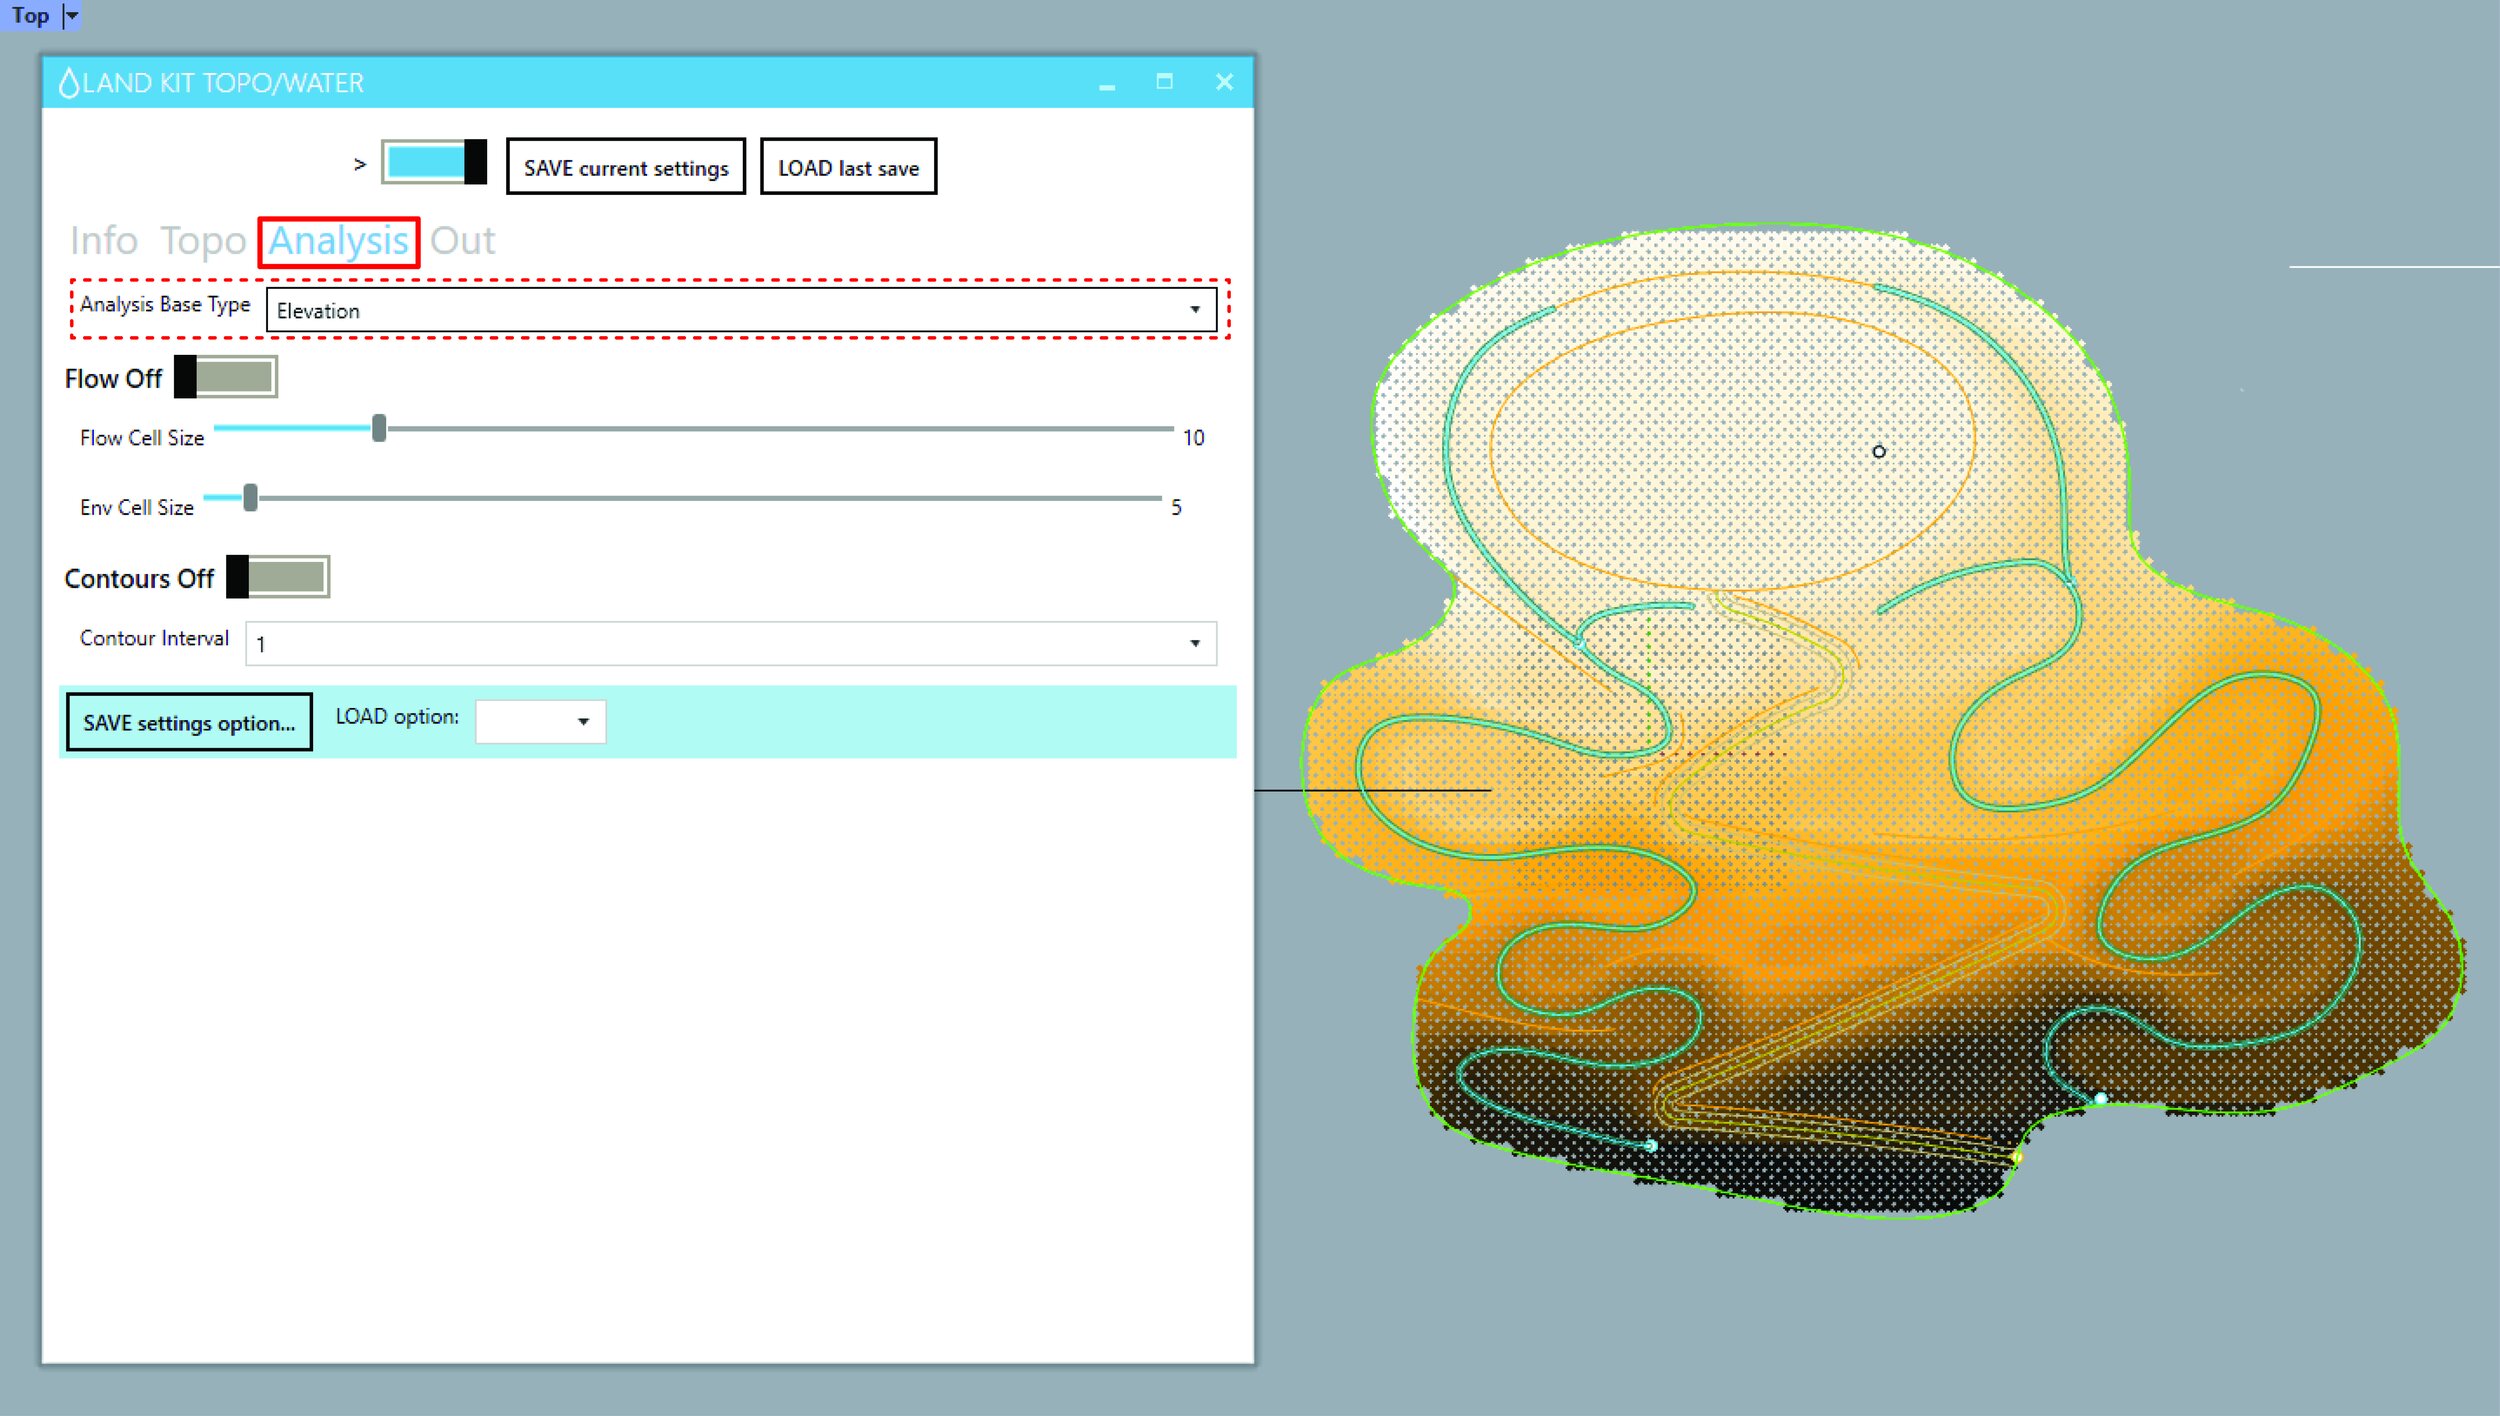
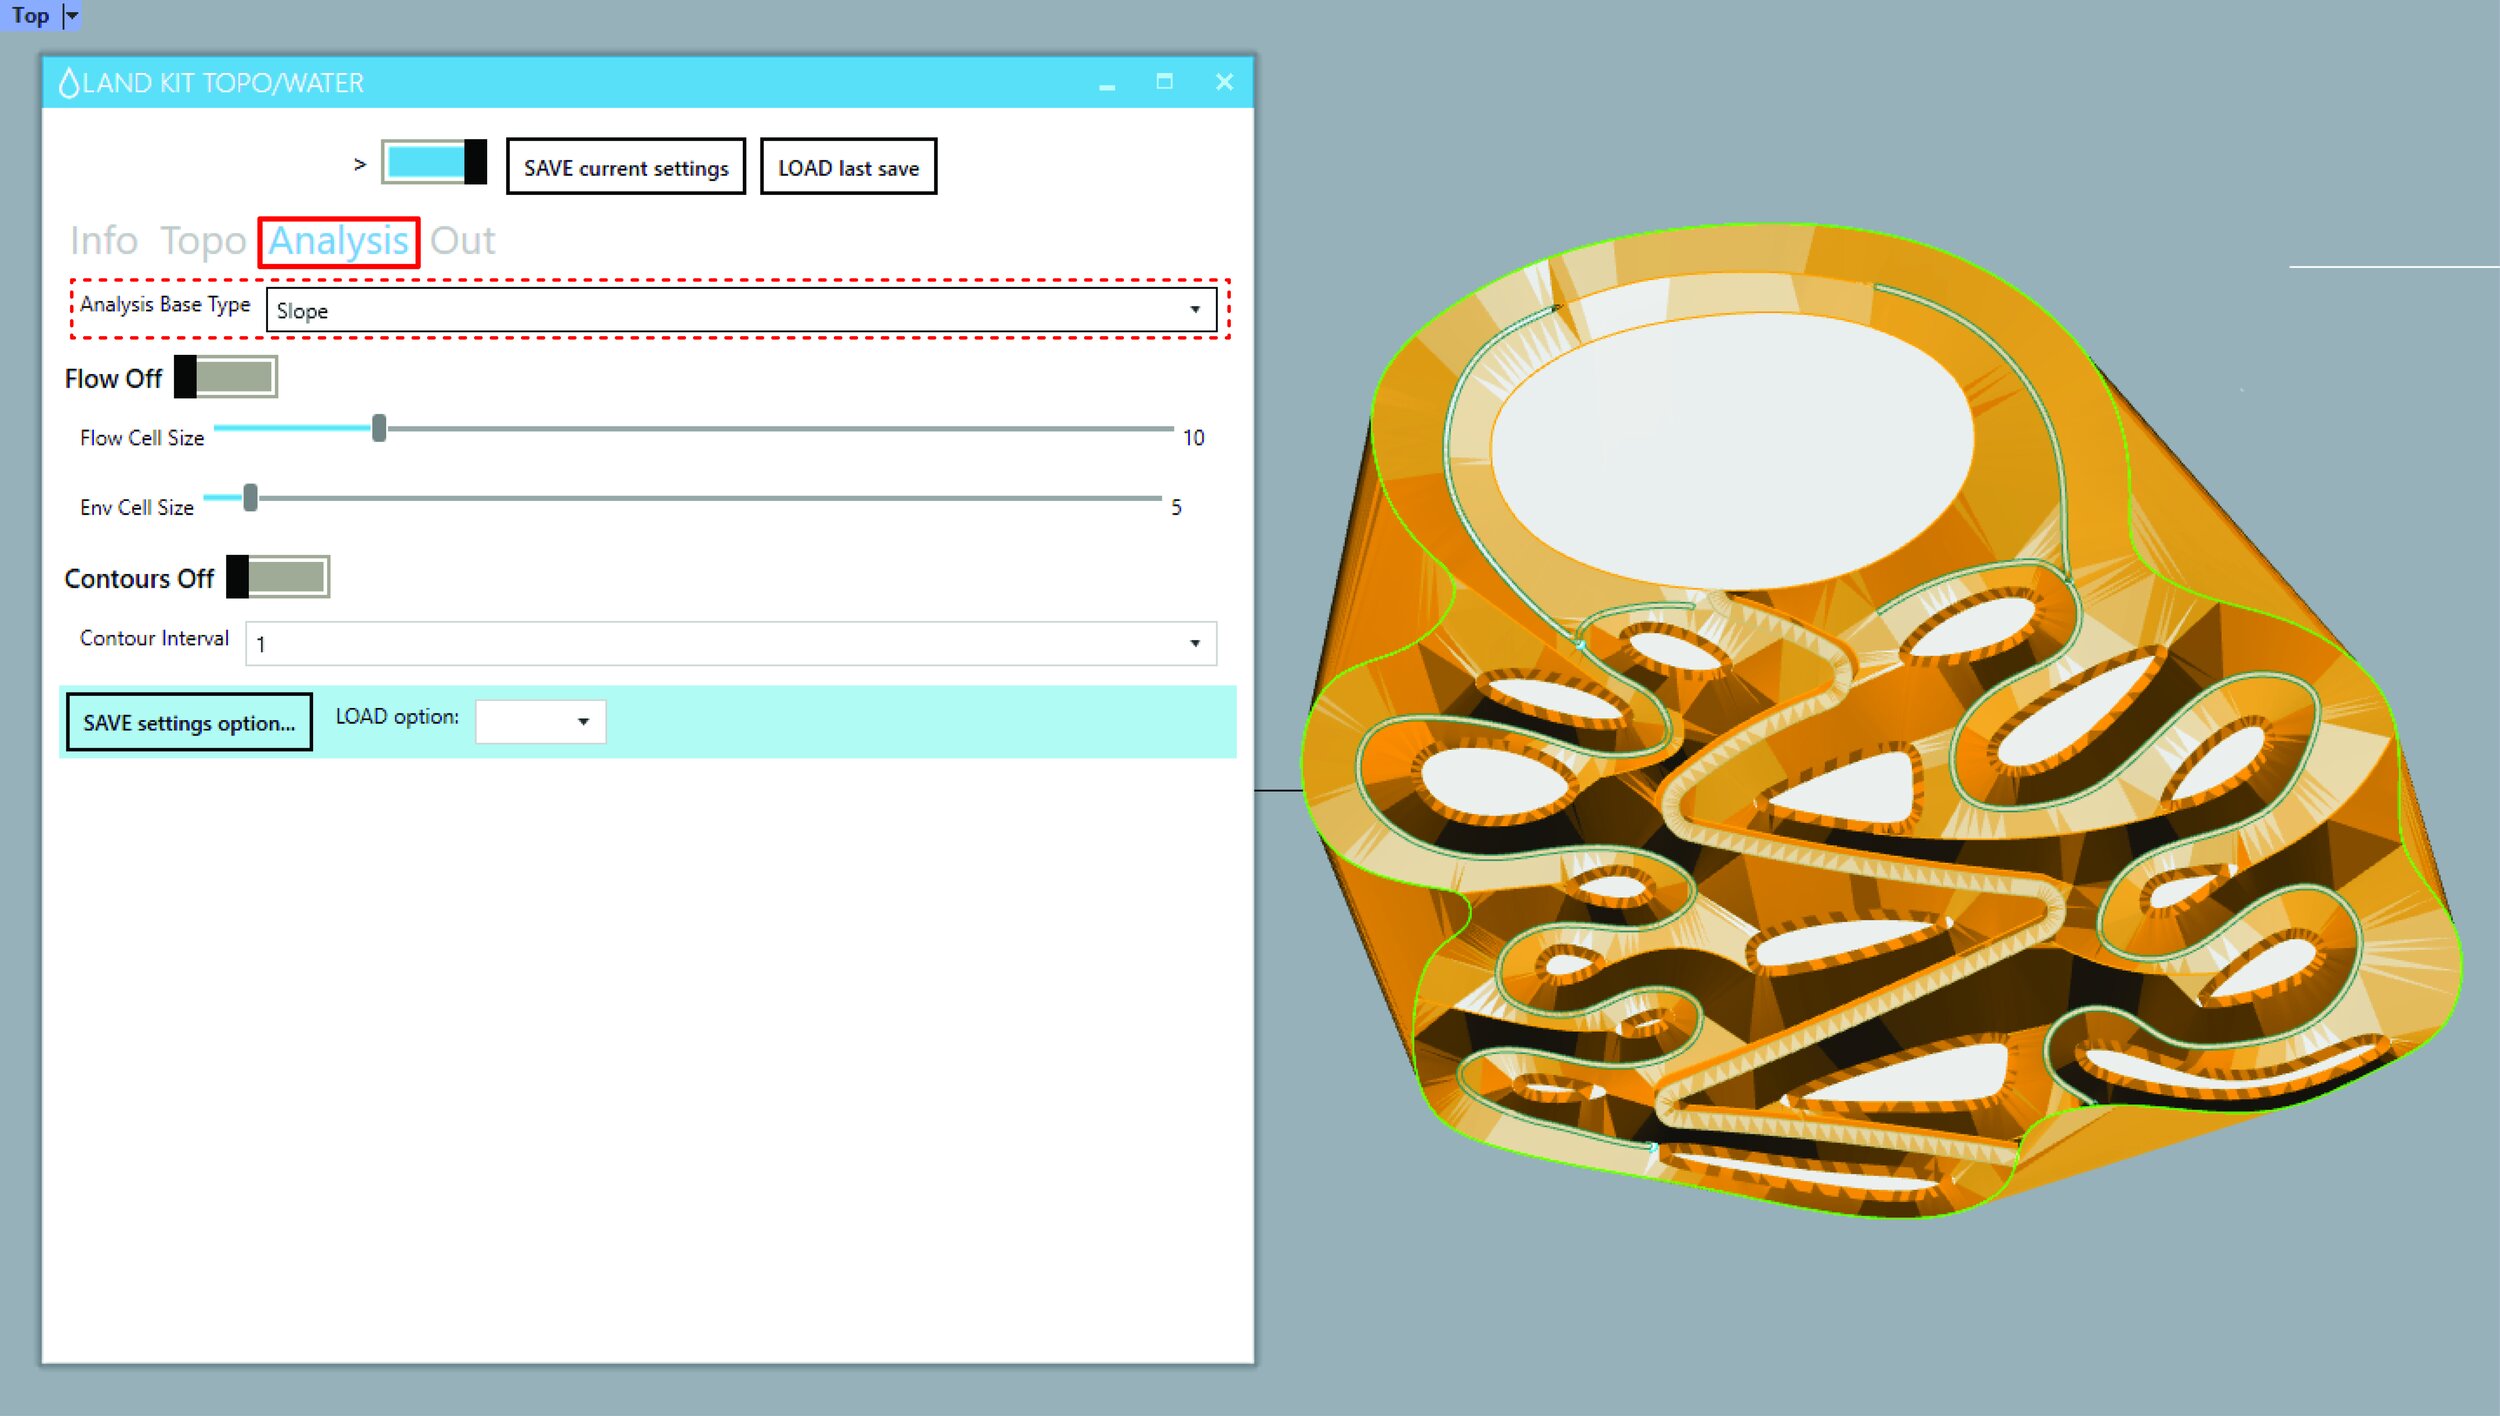
Instant Analysis
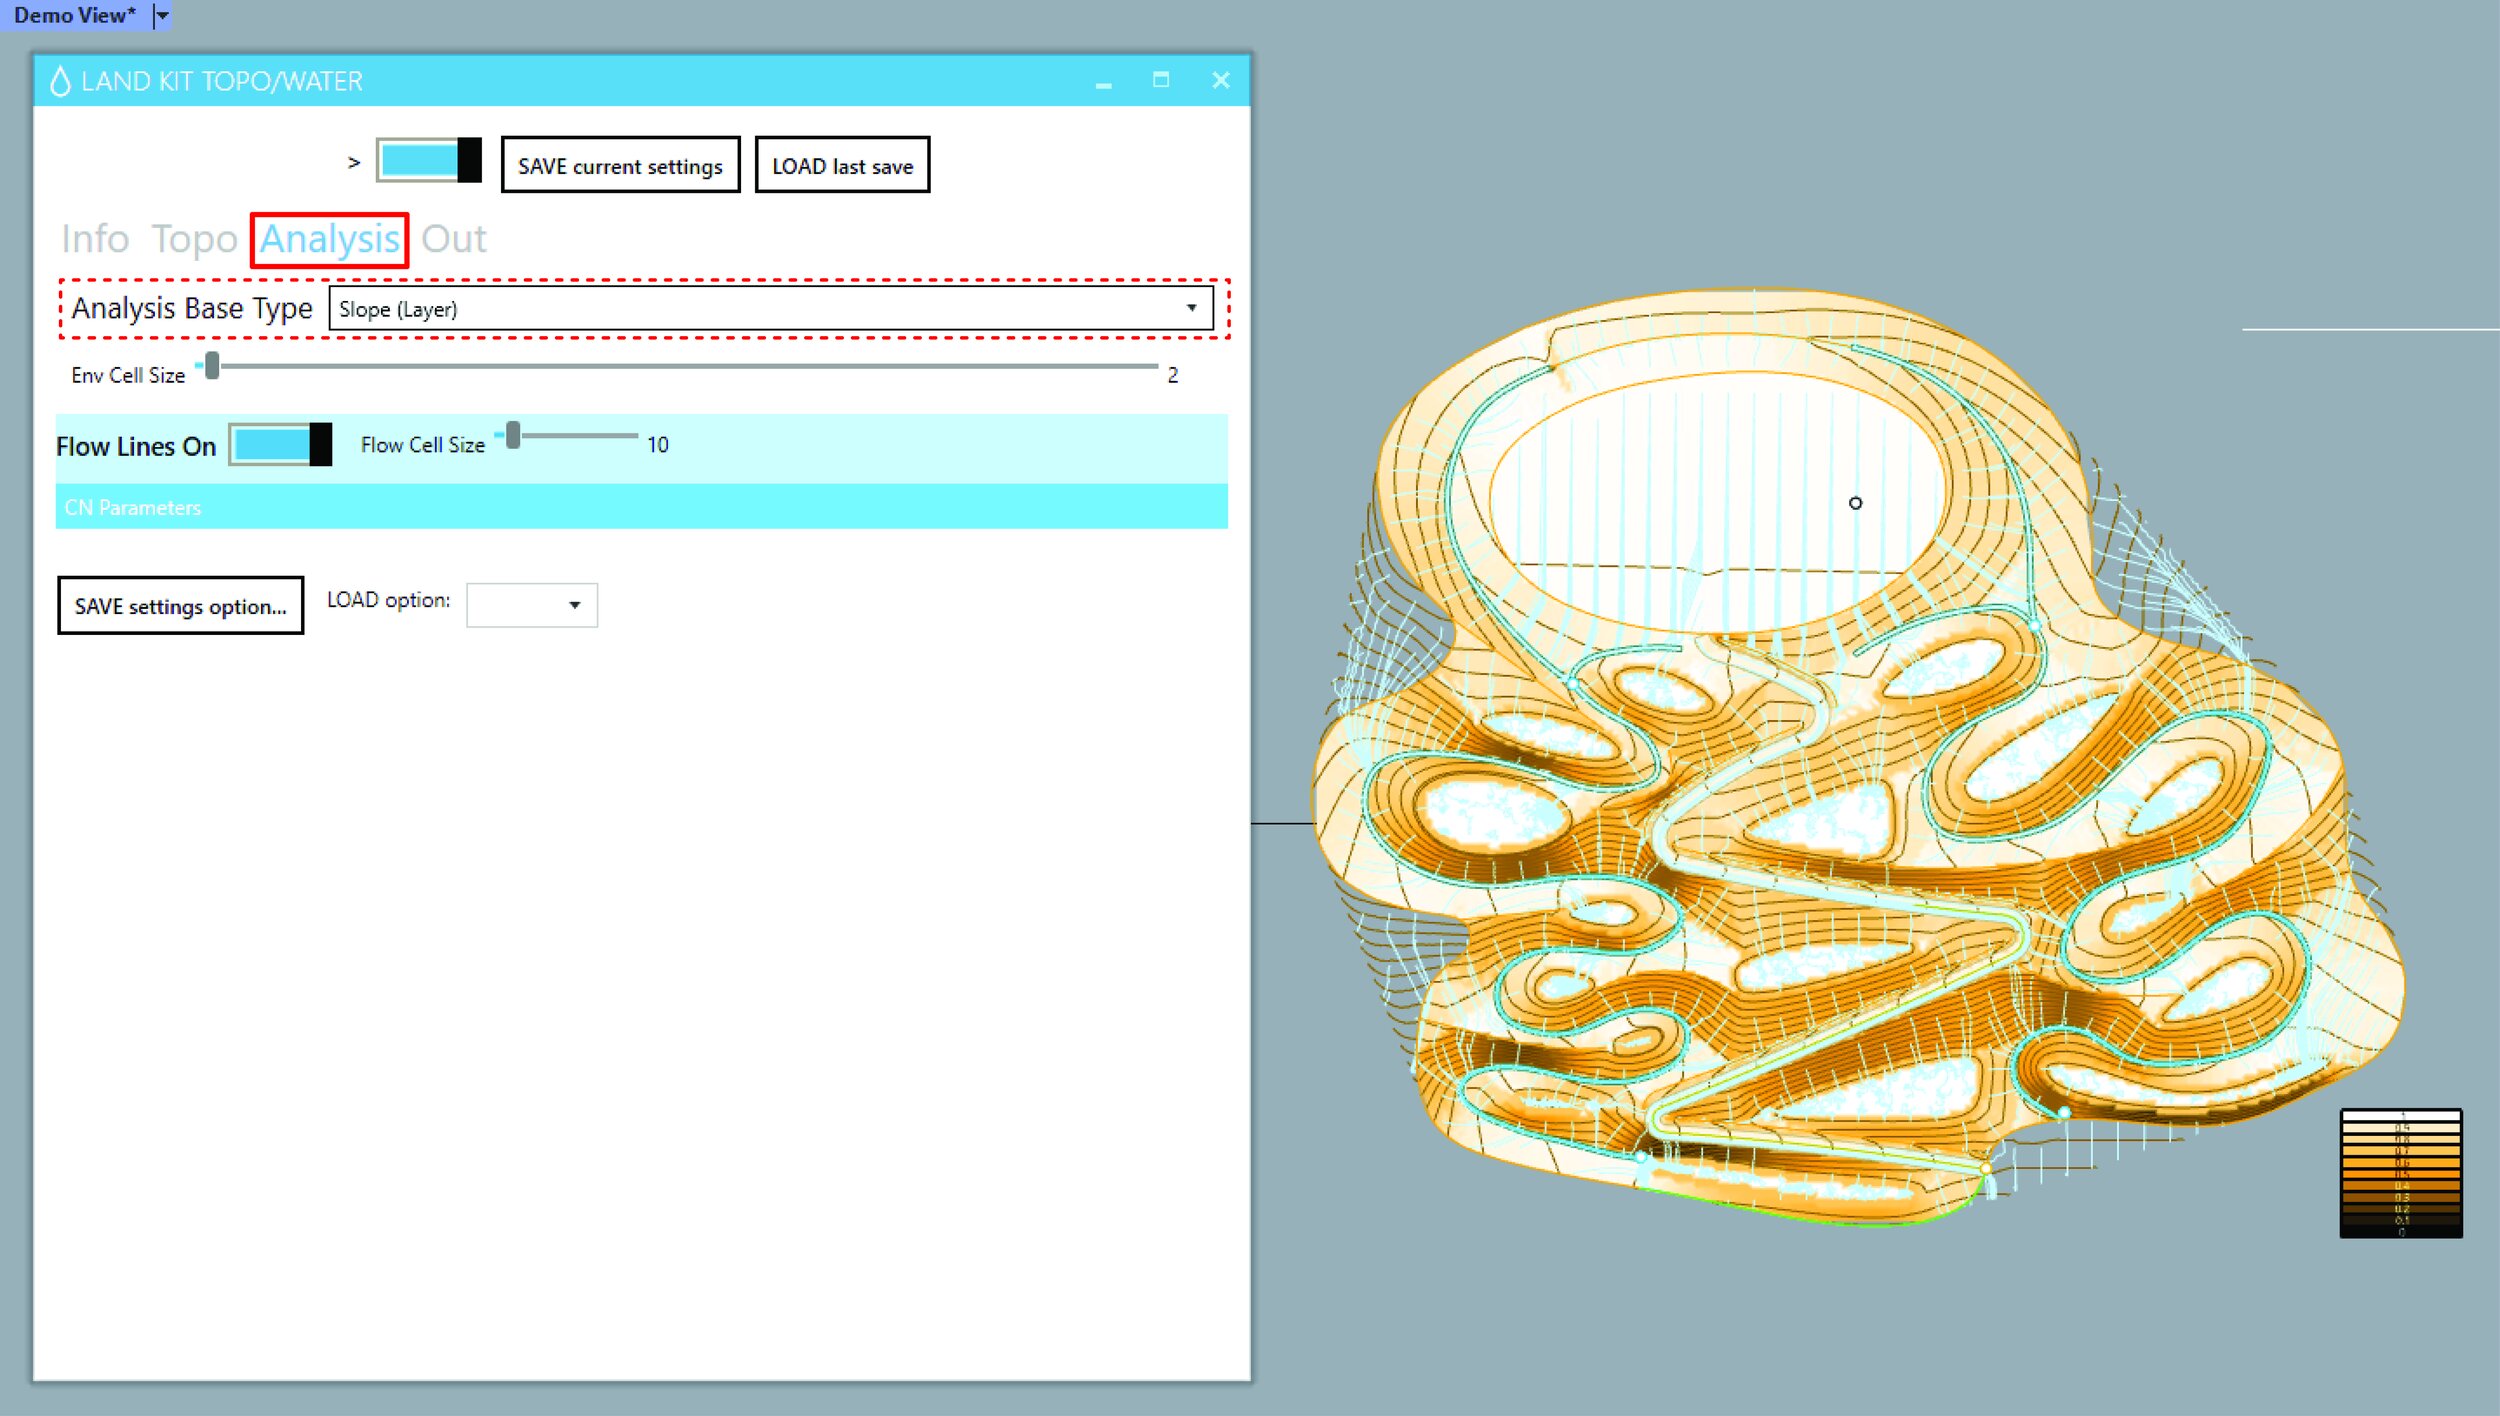
The Analysis tab lets you visualize how your topographic changes have impacted water on your site. The “Analysis Base Type” dropdown menu gives you the power to choose your analysis type, like catchments, upslope area, or just a quick slope and elevation analysis. Adjusting the environment and flow lines cell size will give you a picture of the water itself.
From Workflow to Rhino
Once you’re happy with your model, simply select the Out tab and click either “Bake Topo” or “Bake Flowlines”. Both will turn your analysis into geometry that you can select, toggle, and manipulate in the Rhino space.

Tired of splashing around? Then jump into Pro Workflows!
Gain access to a myriad of extra analyses with the Pro Water Workflow*, as well as quick and easy documentation options.
*Land Kit Pro Key required.


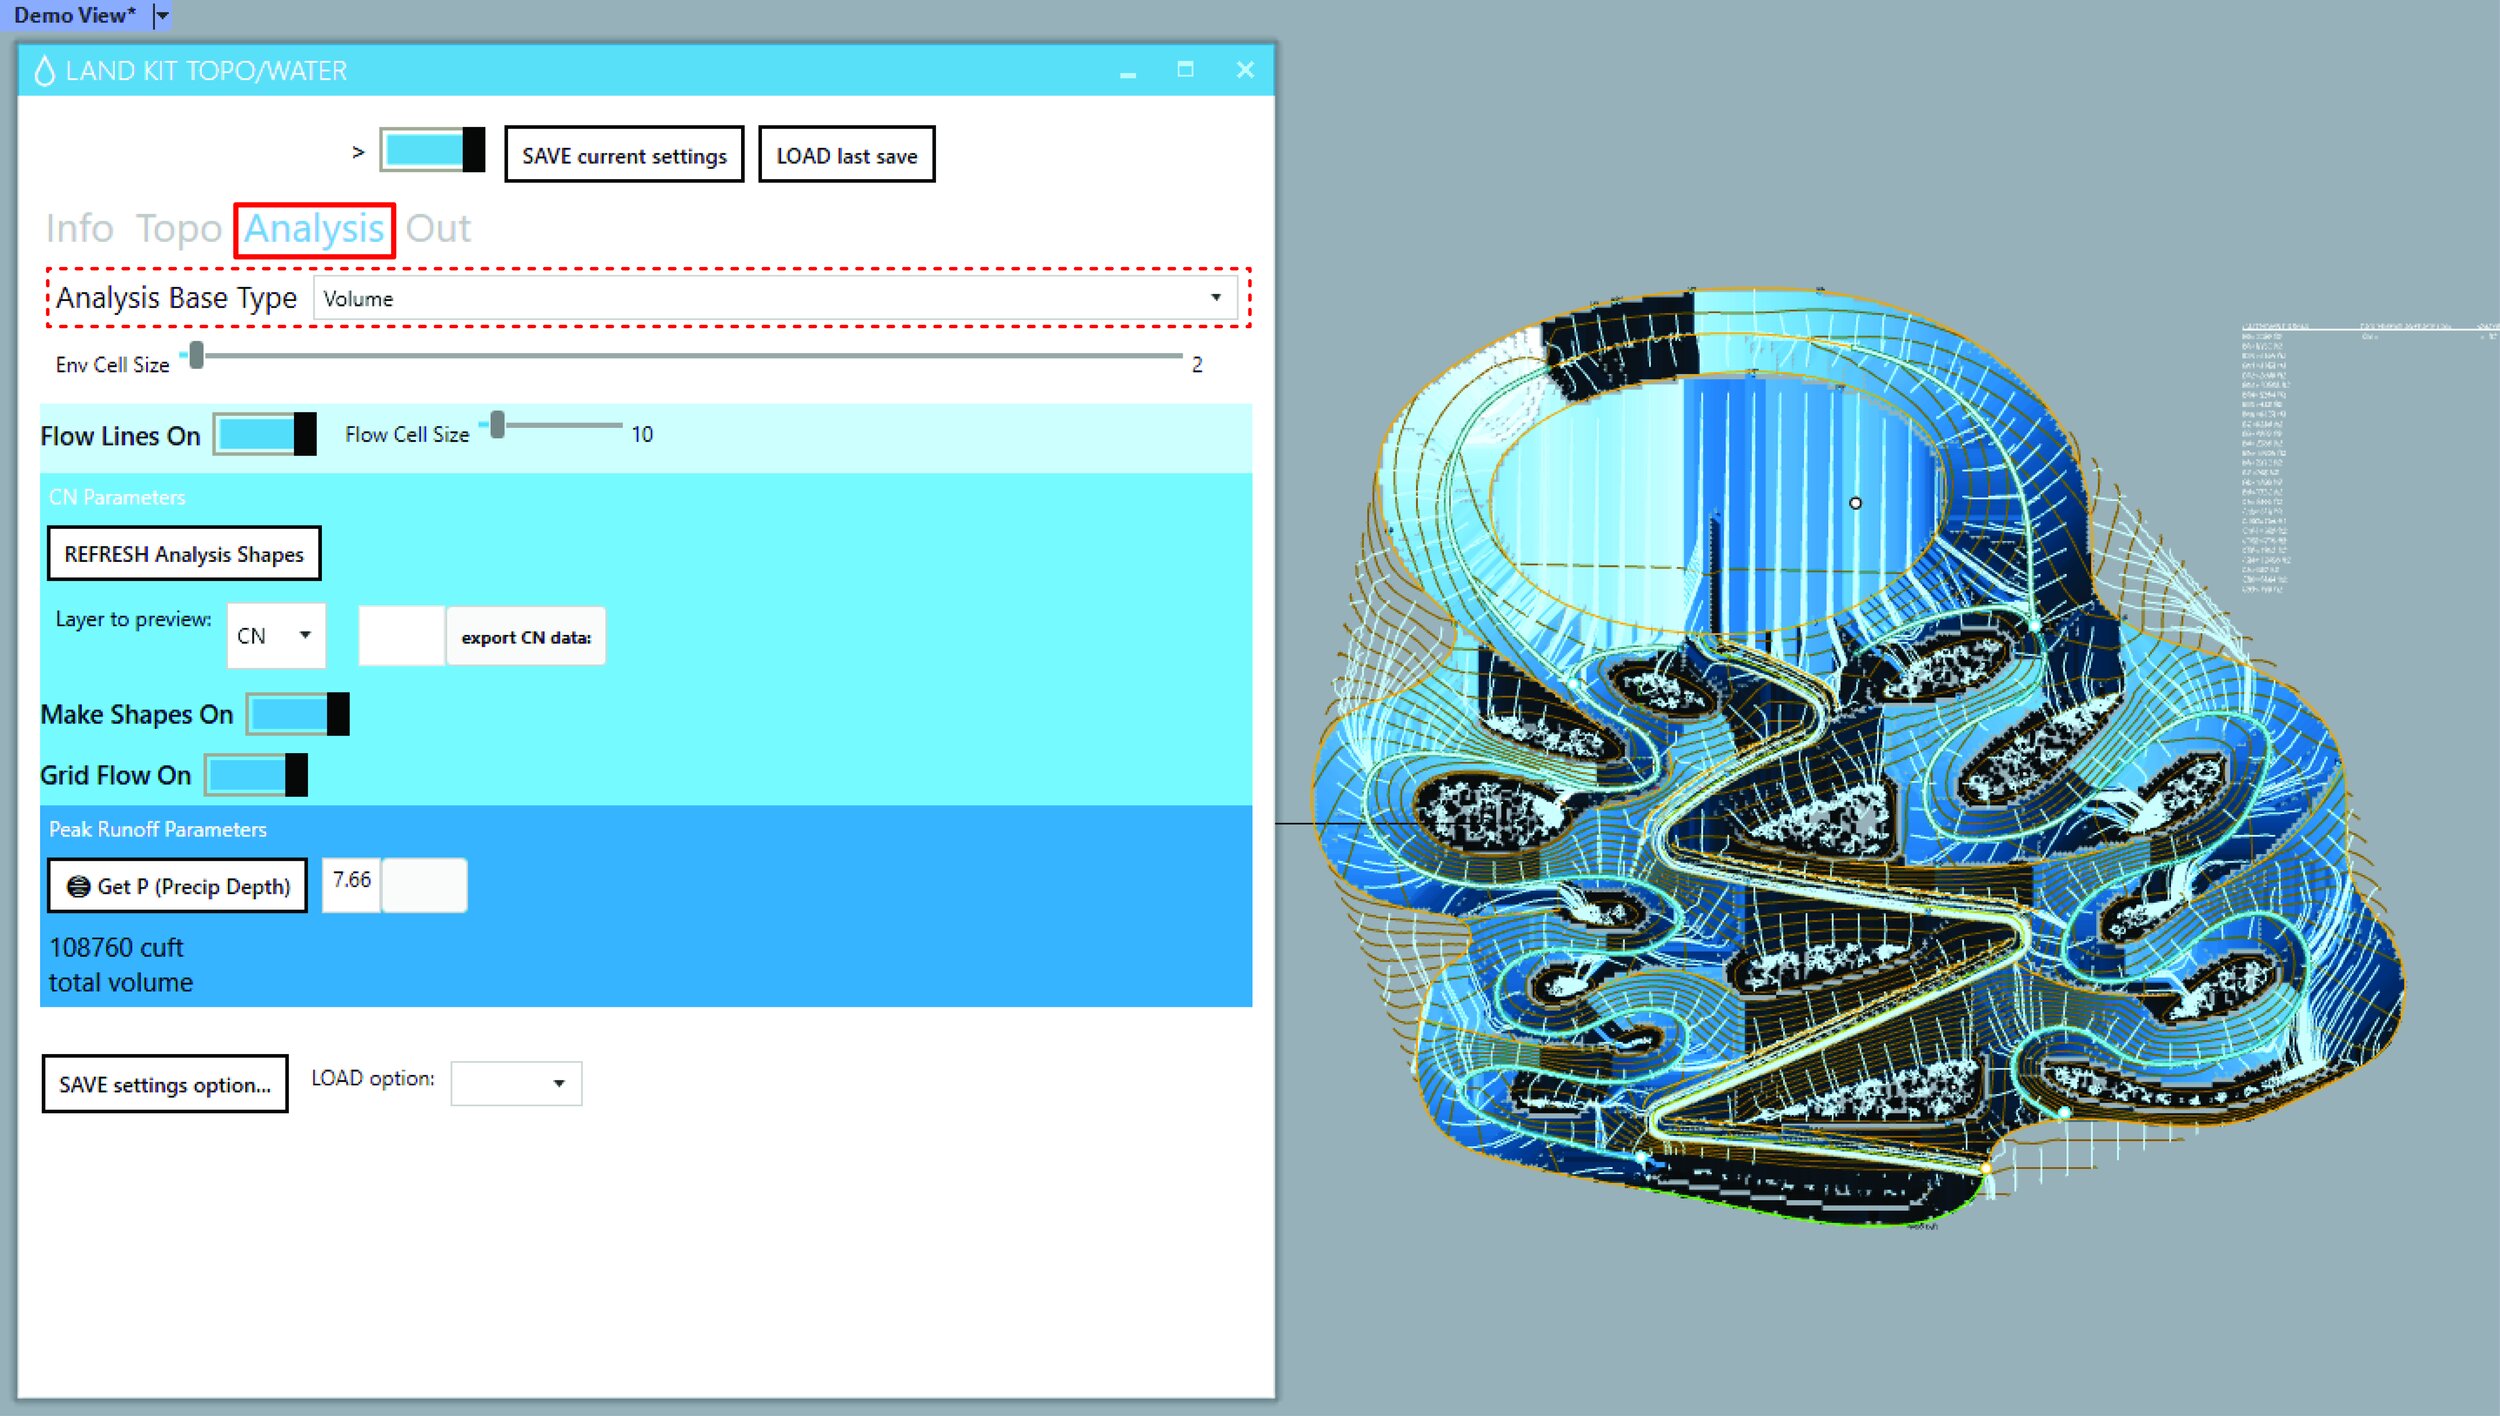
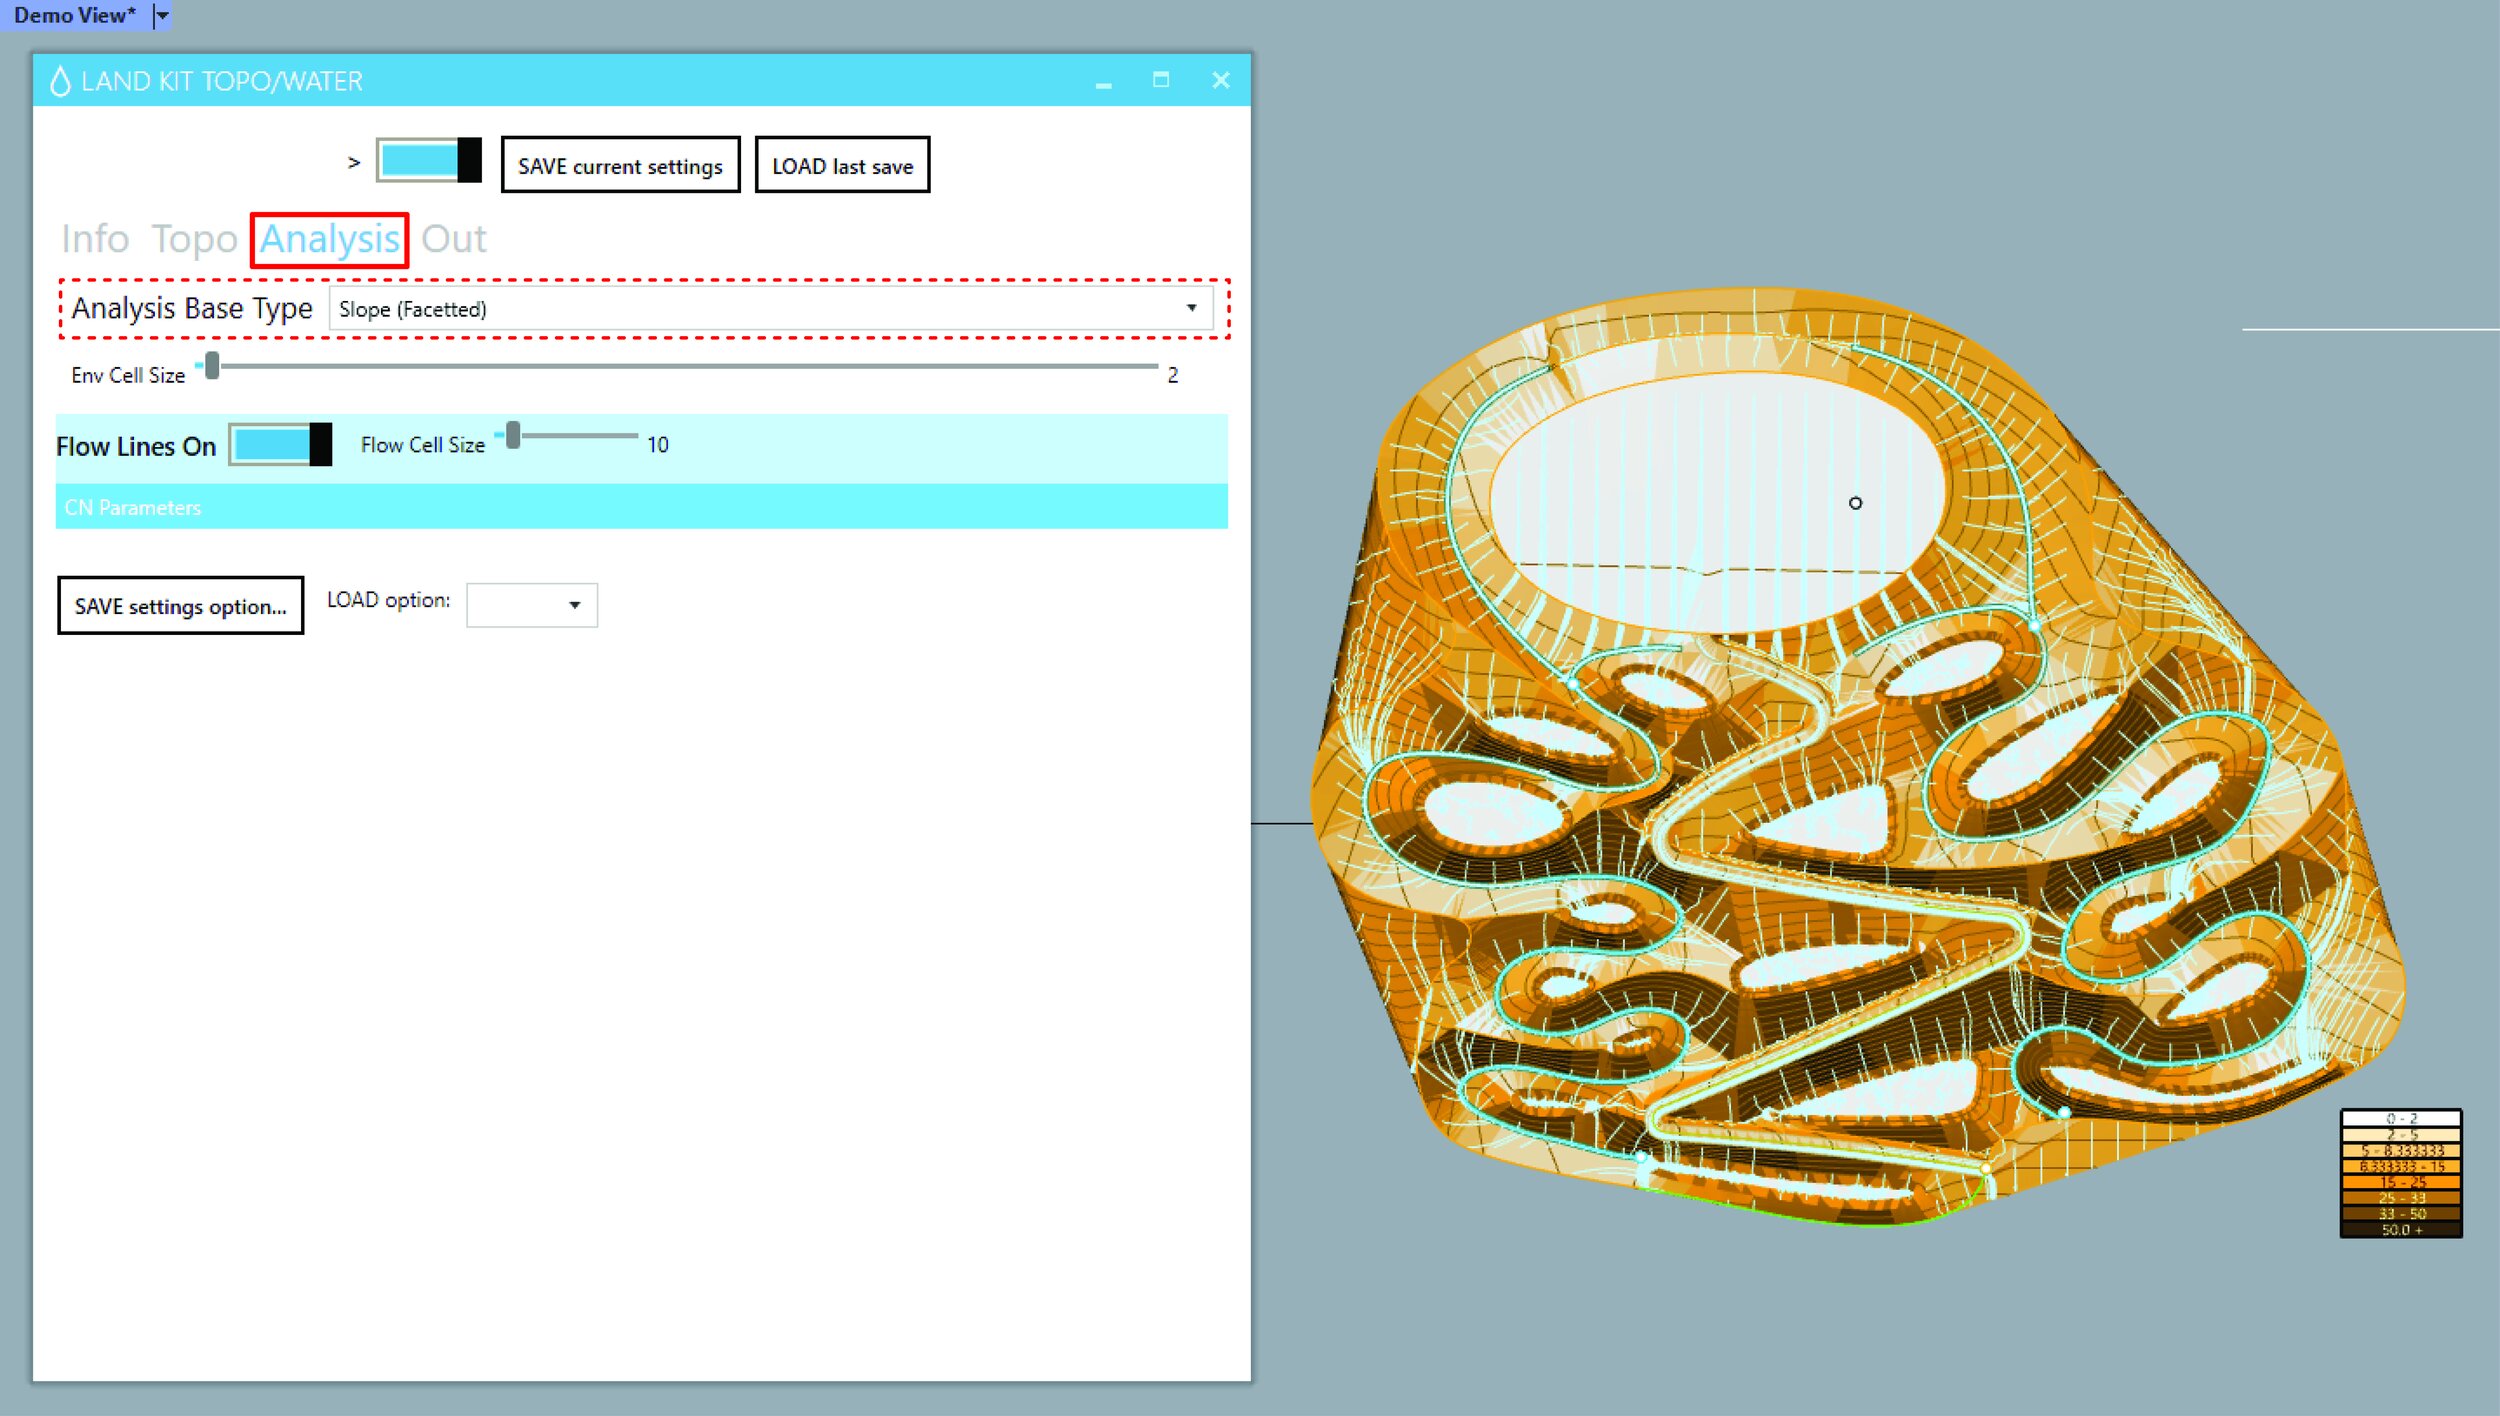
Pro Water Workflows include access to
Static Storage
Flow Intensity
Volume Calcutions
CN Calculation breakdown (for volumes)
Check these workflows out today!!